更新时间:2022-05-01 10:41:24浏览次数:914+次
本文介绍HarmonyOS鸿蒙ARK UI技术之怎么实现一个悬浮框的方法,内容有:准备资料、代码实现、运行效果。
准备资料
1、权限配置
ohos.permission.SYSTEM_FLOAT_WINDOW
2、config.json配置
config.json配置权限,代码如下:
"reqPermissions": [
{
"name": "ohos.permission.SYSTEM_FLOAT_WINDOW"
}
],
在mianAbility进行配置,代码如下:
package com.harmony.alliance.myapplication;
import ohos.ace.ability.AceAbility;
import ohos.aafwk.content.Intent;
public class MainAbility extends AceAbility {
@Override
public void onStart(Intent intent) {
String[] permissions = {
"ohos.permission.WRITE_USER_STORAGE",
"ohos.permission.READ_USER_STORAGE",
"ohos.permission.SYSTEM_FLOAT_WINDOW"};
requestPermissionsFromUser(permissions, 0);
super.onStart(intent);
}
@Override
public void onStop() {
super.onStop();
}
}
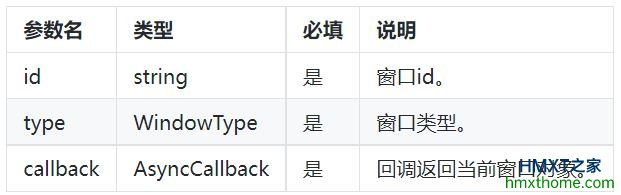
3、创建框口
create(id: string, type: WindowType, callback: AsyncCallback): void
创建子窗口。
参数:
示例:
var windowClass = null;
window.create("first", 1, (err, data) => {
windowClass = data;
if (err) {
console.error('Failed to create the subWindow. Cause: ' + JSON.stringify(err));
return;
}
console.info('SubWindow created. Data: ' + JSON.stringify(data))
windowClass.resetSize(500, 1000);
windowClass.setOutsideTouchable(true);
windowClass.loadContent("pages/index/index", (err, data) => {
});
})
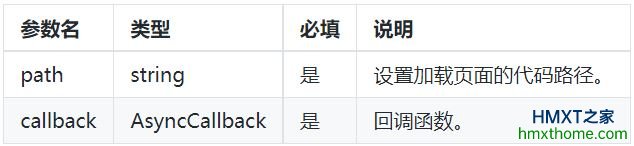
4、加载内容
loadContent (BETA)7+
loadContent(path: string, callback: AsyncCallback): void
子窗口加载具体页面内容。
参数:
示例:
windowClass.loadContent("pages/page2/page2", (err, data) => {
if (err) {
console.error('Failed to load the content. Cause:' + JSON.stringify(err));
return;
}
console.info('Succeeded in loading the content. Data:' + JSON.stringify(data));
});
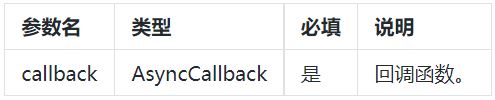
5、窗口显示
show(callback: AsyncCallback): void
显示子窗口。
参数:
示例:
windowClass.show((err, data) => {
if (err) {
console.error('Failed to show the subwindow. Cause: ' + JSON.stringify(err));
return;
}
console.info('Succeeded in showing the subwindow. Data: ' + JSON.stringify(data))
})
代码实现
import router from '@system.router';
import window from '@ohos.window';
@Entry
@Component
struct MywindowPage {
public onclick(){
console.log("####===onclick")
window.create("first", 2038, (err, data) => {
if (err) {
console.log('#####===>Failed to create the subWindow. Cause: ' + JSON.stringify(err));
return;
}
console.info('#####===>SubWindow created. Data: ' + JSON.stringify(data))
data.resetSize(500, 1000);
data.setOutsideTouchable(true);
data.loadContent("pages/index", (err, data) => {
if(err){
console.log("#####===>加载失败")
}
console.log("#####===>加载成功")
});
data.show((err, data) => {
if (err) {
console.error('#####===>Failed to show the subwindow. Cause: ' + JSON.stringify(err));
return;
}
console.log('#####===>Succeeded in showing the subwindow. Data: ' + JSON.stringify(data))
})
})
}
build() {
Flex({ direction: FlexDirection.Column, alignItems: ItemAlign.Center, justifyContent: FlexAlign.Center }) {
Text('创建一个window')
.fontSize(50)
.fontWeight(FontWeight.Bold)
.onClick(this.onclick.bind(this))
}
.width('100%')
.height('100%')
}
}
运行效果
以下是动图,到最后显示出了效果:
相关资讯