更新时间:2022-12-23 10:44:30浏览次数:765+次
本文介绍如何在Ubuntu 20.04 Linux系统上安装和配置Wekan。Wekan是一个免费开源的Trello风格的看板系统,它可以帮助您管理任务,保持您的物品有序,计划假期,准备个人待办事项列表,管理其他人等等。
在Ubuntu 20.04系统上安装和配置Wekan
步骤1、在Ubuntu 20.04上安装Snap
在Ubuntu 20.04/18.04上安装Wekan看板工具的最简单方法是使用snap。安装非常的简单,只需要执行以下命令:
sudo apt update
sudo apt install snap
步骤2、在Ubuntu 20.04上安装Wekan
安装snap包后,运行以下命令安装wekan:
$ sudo snap install wekan
wekan 5.30 from Lauri Ojansivu (xet7) installed
您需要为wekan配置web URL根:
sudo snap set wekan root-url="https://wekan.example.com"
您可以在标准http端口80或其他端口如301上运行Wekan。在Nginx等代理后面运行Wekan时,自定义端口很有用:
sudo snap set wekan port='3001'
sudo systemctl restart snap.wekan.mongodb
sudo systemctl restart snap.wekan.wekan
检查状态:
$ sudo ss -tunelp | grep 3001
tcp LISTEN 0 128 0.0.0.0:3001 0.0.0.0:* users:(("node",pid=5703,fd=14)) ino:29462 sk:6 <->
其systemd服务单元文件是/etc/systemd/system/snap.wekan.wekan.service。要检查服务状态,请使用:
$ systemctl status snap.wekan.wekan
snap.wekan.wekan.service - Service for snap application wekan.wekan
Loaded: loaded (/etc/systemd/system/snap.wekan.wekan.service; enabled; vendor preset: enabled)
Active: active (running)
1、如何禁用和启用wekan服务
使用以下snap命令启用Ubuntu 20.04/18.04上的wekan服务,以便在启动时启动:
sudo snap enable wekan
要禁用服务,请使用:
sudo snap disable wekan
MongoDB服务端口也可以更改为自定义端口:
sudo snap set wekan mongodb-port=27019
2、访问MongoDB CLI进行管理
要使用MongoDB CLI,需要安装MongoDB 3.2.x工具,并在CLI上运行:
$ sudo apt install mongodb-clients -y
$ mongo --port 27019
MongoDB shell version v3.6.8
connecting to: mongodb://127.0.0.1:27019/
WARNING: No implicit session: Logical Sessions are only supported on server versions 3.6 and greater.
Implicit session: dummy session
MongoDB server version: 3.2.22
WARNING: shell and server versions do not match
3、更改后重新启动Wekan
如果在进行更改时需要重新启动Wekan,请使用以下命令:
sudo systemctl restart snap.wekan.wekan
步骤3、设置Snap自动更新
在02:00 AM和04:00 AM之间自动安装所有Snap更新:
snap set core refresh.schedule=02:00-04:00
自动升级发生在Wekan发布后的某个时间,或在预定时间,或通过以下方式进行:
$ sudo snap refresh
INFO Waiting for automatic snapd restart...
snapd 2.50.1 from Canonical refreshed
步骤4、配置Wekan电子邮件设置(可选)
配置管理员通知电子邮件。这是可选的,因为Wekan不需要电子邮件配置即可运行:
sudo snap set wekan mail-url='smtps://user:pass@mailserver.example.com:453'
sudo snap set wekan mail-from='Wekan Boards <wekan@example.com>'
步骤5、配置不带SSL的Nginx
安装nginx web服务器:
sudo apt install nginx -y
对于默认Nginx配置,/etc/Nginx/Nginx.conf:
$ sudo vim /etc/nginx/nginx.conf
以下是建议的设置:
user www-data;
worker_processes auto;
pid /run/nginx.pid;
include /etc/nginx/modules-enabled/*.conf;
events {
worker_connections 1024;
# multi_accept on;
}
http {
##
# Basic Settings
##
sendfile on;
tcp_nopush on;
tcp_nodelay on;
types_hash_max_size 2048;
server_tokens off;
set_real_ip_from 0.0.0.0/32; # All addresses get a real IP.
real_ip_header X-Forwarded-For;
limit_conn_zone $binary_remote_addr zone=arbeit:10m;
client_body_timeout 60;
client_header_timeout 60;
keepalive_timeout 10 10;
send_timeout 60;
reset_timedout_connection on;
# server_names_hash_bucket_size 64;
# server_name_in_redirect off;
include /etc/nginx/mime.types;
default_type application/octet-stream;
##
# SSL Settings
##
ssl_protocols TLSv1.2 TLSv1.1 TLSv1; # Dropping SSLv3, ref: POODLE
ssl_prefer_server_ciphers on;
ssl_session_cache shared:SSL:30m;
ssl_session_timeout 1d;
ssl_ciphers ECDH+aRSA+AESGCM:ECDH+aRSA+SHA384:ECDH+aRSA+SHA256:ECDH:EDH+CAMELLIA:EDH+aRSA:+CAMELLIA256:+AES256:+CAMELLIA128:+AES128:+SSLv3:!aNULL:!eNULL:!LOW:!3DES:!MD5:!EXP:!PSK:!SRP:!DSS:!RC4:!SEED:!ECDSA:CAMELLIA256-SHA:AES256-SHA:CAMELLIA128-SHA:AES128-SHA;
ssl_ecdh_curve secp384r1;
ssl_stapling on;
ssl_stapling_verify on;
add_header X-XSS-Protection '1; mode=block';
add_header X-Frame-Options SAMEORIGIN;
add_header Strict-Transport-Security 'max-age=31536000';
add_header X-Content-Options nosniff;
add_header X-Micro-Cache $upstream_cache_status;
##
# Logging Settings
##
access_log /var/log/nginx/access.log;
error_log /var/log/nginx/error.log;
##
# Gzip Settings
##
gzip on;
gzip_disable "msie6";
gzip_buffers 16 8k;
gzip_comp_level 1;
gzip_http_version 1.1;
gzip_min_length 10;
gzip_types text/plain text/css application/json application/javascript text/xml application/xml application/xml+rss text/javascript image/x-icon application/vnd.ms-fontobject font/opentype application/x-font-ttf;
gzip_vary on;
gzip_proxied any; # Compression for all requests.
##
# Virtual Host Configs
##
include /etc/nginx/conf.d/*.conf;
include /etc/nginx/sites-enabled/*;
}
如果要使用SSL,请检查步骤6。对于仅http服务,请为Wekan创建Nginx虚拟主机:
sudo vim /etc/nginx/conf.d/wekan.conf
将以下内容添加到文件中:
# This section is needed to proxy web-socket connections
map $http_upgrade $connection_upgrade {
default upgrade;
'' close;
}
# HTTP
server {
listen 80;
server_name wekan.example.com;
# If your application is not compatible with IE <= 10, this will redirect visitors to a page advising a browser update
# This works because IE 11 does not present itself as MSIE anymore
if ($http_user_agent ~ "MSIE" ) {
return 303 https://browser-update.org/update.html;
}
# Pass requests to Wekan.
# If you have Wekan at https://example.com/wekan, change the location to:
# location /wekan {
location / {
proxy_pass http://127.0.0.1:3001;
proxy_http_version 1.1;
proxy_set_header Upgrade $http_upgrade; # allow websockets
proxy_set_header Connection $connection_upgrade;
proxy_set_header X-Forwarded-For $remote_addr; # preserve client IP
# this setting allows the browser to cache the application in a way compatible with Meteor
# on every applicaiton update the name of CSS and JS file is different, so they can be cache infinitely (here: 30 days)
# the root path (/) MUST NOT be cached
#if ($uri != '/wekan') {
# expires 30d;
#}
}
}
别忘了用实际域替换wekan.example.com。
验证nginx配置:
$ sudo nginx -t
nginx: the configuration file /etc/nginx/nginx.conf syntax is ok
nginx: configuration file /etc/nginx/nginx.conf test is successful
步骤6、Wekan SSL加密与Let’s Encrypt(可选)
本节演示如何使用Let's Encrypt来保护对Wekan Dashboard的访问。可以使用任何其他有效的SSL证书,并跳过Let's Encrypt证书生成步骤。
要请求certbot SSL证书,您需要打开端口80,并且任何web服务都不使用该端口。如果UFW防火墙正在运行,请使用以下方法打开端口:
sudo ufw allow proto tcp from any to any port 80,443
我们将使用.certbot请求证书。提供有效的电子邮件地址以发送到期通知,以及用于Wekan的有效域:
sudo apt update
sudo apt install certbot -y
export DOMAIN="wekan.example.com"
export EMAIL="domain-manager@example.com"
sudo systemctl stop nginx
sudo certbot certonly --standalone -d $DOMAIN --preferred-challenges http --agree-tos -n -m $EMAIL --keep-until-expiring
完成后。配置Nginx代理:
sudo vim /etc/nginx/conf.d/wekan.conf
将这些内容粘贴到文件wekan.conf中:
# this section is needed to proxy web-socket connections
map $http_upgrade $connection_upgrade {
default upgrade;
'' close;
}
# HTTP
server {
listen 80;
server_name wekan.example.com;
# redirect non-SSL to SSL
location / {
rewrite ^ https://example.com$request_uri? permanent;
}
}
# HTTPS server
server {
listen 443 ssl http2; # we enable HTTP/2 here (previously SPDY)
server_name example.com; # this domain must match Common Name (CN) in the SSL certificate
ssl_certificate /etc/letsencrypt/live/wekan.example.com/fullchain.pem;
ssl_certificate_key /etc/letsencrypt/live/wekan.example.com/privkey.pem;
# If your application is not compatible with IE <= 10, this will redirect visitors to a page advising a browser update
# This works because IE 11 does not present itself as MSIE anymore
if ($http_user_agent ~ "MSIE" ) {
return 303 https://browser-update.org/update.html;
}
# Pass requests to Wekan.
# If you have Wekan at https://example.com/wekan , change location to:
# location /wekan {
location / {
proxy_pass http://127.0.0.1:3001;
proxy_http_version 1.1;
proxy_set_header Upgrade $http_upgrade; # allow websockets
proxy_set_header Connection $connection_upgrade;
proxy_set_header X-Forwarded-For $remote_addr; # preserve client IP
# this setting allows the browser to cache the application in a way compatible with Meteor
# on every applicaiton update the name of CSS and JS file is different, so they can be cache infinitely (here: 30 days)
# the root path (/) MUST NOT be cached
#if ($uri != '/wekan') {
# expires 30d;
#}
}
}
将所有出现的wekan.example.com替换为您的wekan域名。
启动nginx服务并使其在启动时启动:
$ sudo nginx -t
nginx: the configuration file /etc/nginx/nginx.conf syntax is ok
nginx: configuration file /etc/nginx/nginx.conf test is successful
如果配置正常,请通过启动nginx服务使用它:
sudo systemctl restart nginx
sudo systemctl enable nginx
确认nginx服务确实在运行:
$ systemctl status nginx
您可以通过运行以下命令查看wekan帮助页面:
wekan.help
步骤7、添加Wekan UI用户
转到您的Wekan URL,如https://example.com/sign-up页,对于新安装,您需要注册以获得管理员帐户:
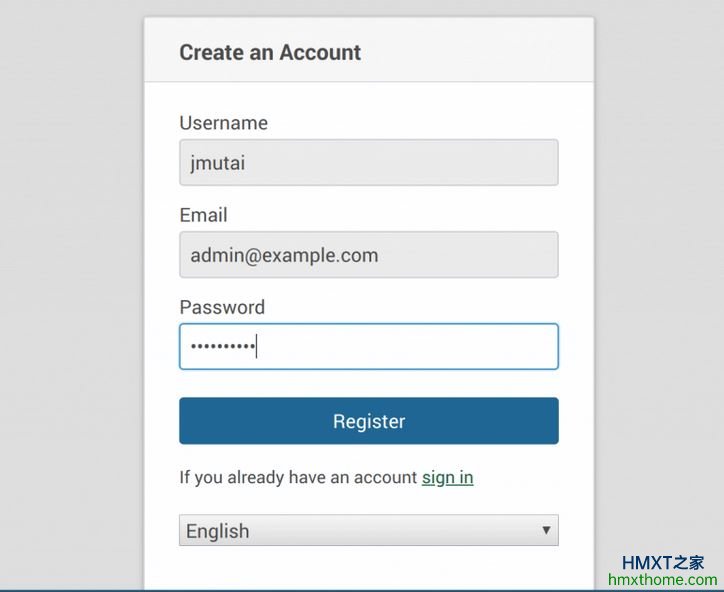
注册您的用户名、电子邮件地址和密码。要注册的第一个用户具有管理员权限,下一个用户将是普通用户。如果您也需要其他管理员,您可以在管理面板中将其权限更改为管理员:
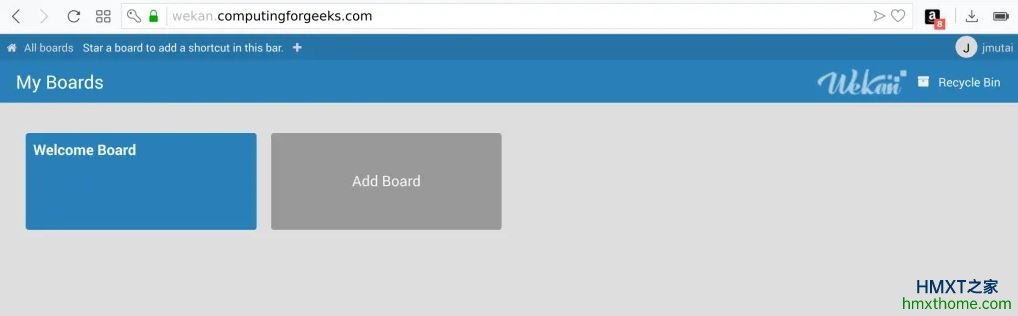
注意:如果你收到一些关于电子邮件设置的错误,你可以忽略它。不需要工作电子邮件。Wekan无需设置电子邮件即可工作。当前创建帐户后。登录Wekan页面进入即可。
附:注册普通用户的说明
默认情况下,其他用户可以通过访问页面注册自己以及创建帐户。如果要禁用自注册,请导航到管理面板>设置>注册>[X]禁用自注册(Admin Panel > Settings > Registration > [X] Disable self-registration)。然后通过电子邮件地址邀请新用户加入。
相关资讯


