更新时间:2023-01-17 10:16:52浏览次数:487+次
本文介绍在Rocky Linux 9/AlmaLinux 9系统上安装和配置InfluxDB 2的方法。InluxDB是高性能时间序列数据库,是TICK堆栈的核心,它是从地面设计来处理大量时间序列数据的,它按时间顺序存储收集的数据,这是一系列数据点,这对于DevOps、物联网监控以及实时分析和监控等情况至关重要。
安装InfluxDB 2的方法
默认Rocky Linux 9/AlmaLinux 9存储库中不存在InluxDB 2。为了能够安装它,您需要将下面的TICK堆栈存储库添加到系统中:
cat <<EOF | sudo tee /etc/yum.repos.d/influxdb.repo
[influxdb]
name = InfluxDB Repository - RHEL \$releasever
baseurl = https://repos.influxdata.com/rhel/\$releasever/\$basearch/stable
enabled = 1
gpgcheck = 1
gpgkey = https://repos.influxdata.com/influxdb.key
EOF
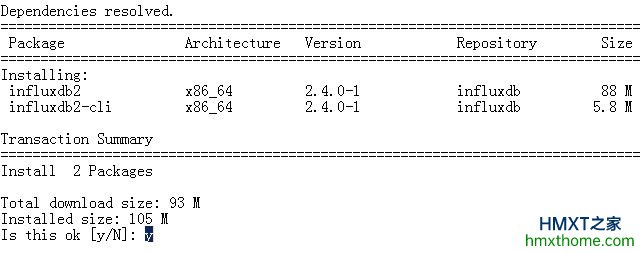
添加存储库后,可以使用以下命令安装InluxDB2:
sudo dnf install influxdb2 influxdb2-cli
还接受GPG密钥导入:
Importing GPG key 0x2582E0C5:
Userid : "InfluxDB Packaging Service <support@influxdb.com>"
Fingerprint: 05CE 1508 5FC0 9D18 E99E FB22 684A 14CF 2582 E0C5
From : https://repos.influxdata.com/influxdb.key
Is this ok [y/N]: y
现在启动并启用服务:
sudo systemctl start influxdb
sudo systemctl enable influxdb
检查服务是否正在运行:
$ systemctl status influxdb
influxdb.service - InfluxDB is an open-source, distributed, time series database
Loaded: loaded (/usr/lib/systemd/system/influxdb.service; enabled; vendor preset: disabled)
Active: active (running)
检查InfluxDB正在侦听的端口:
$ sudo ss -plunt|grep influxd
tcp LISTEN 0 4096 *:8086 *:* users:(("influxd",pid=1931,fd=9))
允许InluxDB端口通过防火墙:
sudo firewall-cmd --add-port=8086/tcp --permanent
sudo firewall-cmd --reload
配置InfluxDB 2的方法
首先,使用以下命令创建令牌、主要用户、组织和存储桶:
influx setup -t strong_influxdb_token
按以下步骤操作:
> Welcome to InfluxDB 2.0!
? Please type your primary username admin
? Please type your password *********
? Please type your password again *********
? Please type your primary organization name my-org
? Please type your primary bucket name my-bucket
? Please type your retention period in hours, or 0 for infinite 0
? Setup with these parameters?
Username: admin
Organization: my-org
Bucket: my-bucket
Retention Period: infinite
(y/N) y
检查令牌列表:
$ influx auth list
会返回ID、令牌、用户名、用户ID及权限信息:
09e24f5ad13b5000 admin's Token strong_influxdb_token admin 09e24f5aacbb5000 [read:/authorizations write:/authorizations read:/buckets write:/buckets read:/dashboards write:/dashboards read:/orgs write:/orgs read:/sources write:/sources read:/tasks write:/tasks read:/telegrafs write:/telegrafs read:/users write:/users read:/variables write:/variables read:/scrapers write:/scrapers read:/secrets write:/secrets read:/labels write:/labels read:/views write:/views read:/documents write:/documents read:/notificationRules write:/notificationRules read:/notificationEndpoints write:/notificationEndpoints read:/checks write:/checks read:/dbrp write:/dbrp read:/notebooks write:/notebooks read:/annotations write:/annotations read:/remotes write:/remotes read:/replications write:/replications]
创建后,使用创建的令牌访问CLI:
$ influx v1 shell --token strong_influxdb_token
InfluxQL Shell 2.4.0
Connected to InfluxDB OSS v2.4.0
一旦进入shell,您就可以列出可用的数据库/桶:
> show databases
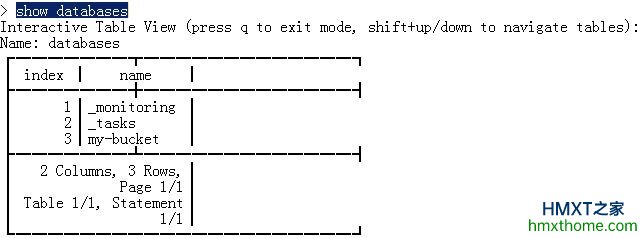
要退出,请按q。
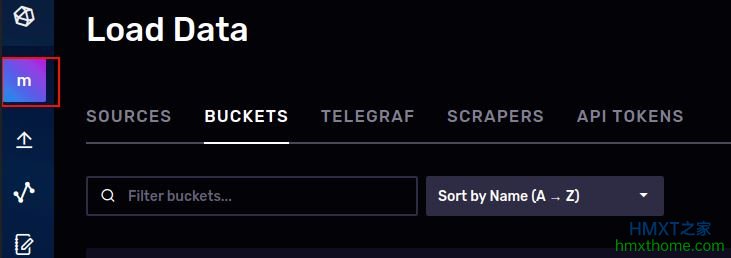
至此,您现在可以使用URL登录到web界面,地址格式为http://IP_Address:8086,使用配置的用户名及密码登陆:
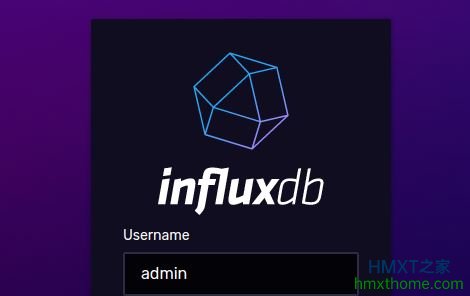
向下面的仪表板提供要验证的创建用户和密码:
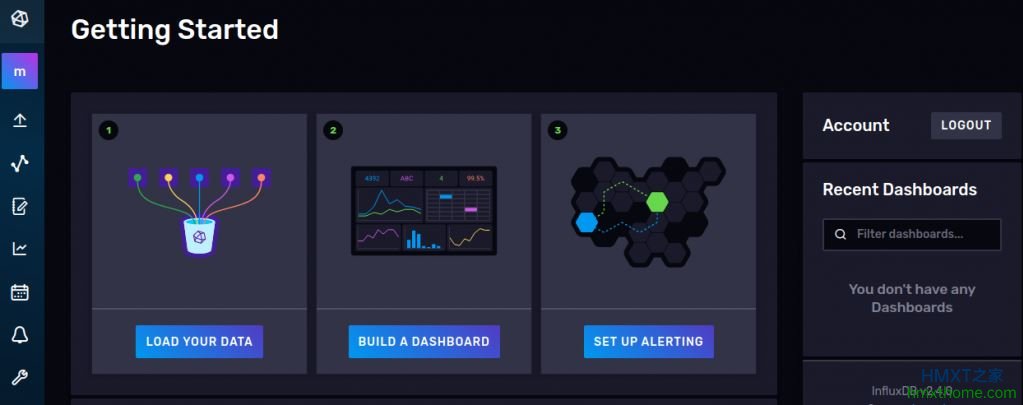
在此仪表板上,您可以查看图表、桶、组织:
至此,配置InfluxDB 2完成。
相关资讯


