更新时间:2022-12-19 10:15:01浏览次数:784+次
本文介绍在Ubuntu 20.04 Linux系统上安装Puppet Master和Agent的方法,也适用在Ubuntu 22.04及18.04版本上。Puppet是一个用Ruby和C++编写的配置管理工具,可帮助您在数百到数千个系统中自动配置和部署应用程序,该软件使用Apache许可证,可在Linux、Unix和Windows环境中运行。当前,Puppet agent和主服务器之间的通信是通过带有客户端验证的加密隧道(HTTPS)进行的,通过使用像Puppet这样的配置管理系统,作为系统管理员,您可以通过删除所有手动重复任务来专注于生产任务。
在Ubuntu 20.04上安装Puppet Master前的配置
现在让我们进入Ubuntu 20.04上Puppet Master的安装过程。我的实验室环境如下:
1]、Puppet Master
Hostname: puppetmaster
IP Address: 192.168.1.2
2]、Puppet Agent(用于测试)
Hostname: puppetclient
IP Address: 192.168.1.3
下面是设置前提条件说明。
Puppet Master的关键要求之一是网络时间同步。我们将确保我们在Puppet主服务器上设置了正确的时区以及NTP服务。我们稍后将配置Agent节点以将它们的时间与Puppet Master同步,
步骤1:设置正确的时区
Ubuntu 18.04+附带了timedatectl命令行工具,您可以使用它在服务器上设置正确的时区。按如下方式使用:
sudo timedatectl set-timezone Asia/Shanghai
使用以下方法确认更改:
$ timedatectl
在返回的信息会看到Time zone: Asia/Shanghai。
步骤2:设置服务器主机名
使用hostnamectl命令设置服务器主机名:
export HOST_NAME="puppetmaster"
sudo hostnamectl set-hostname ${HOST_NAME}
再次登录并确认新主机名:
$ hostname
puppetmaster
将稍后将使用的正确主机名和IP地址添加到/etc/hosts文件中:
$ sudo vim /etc/hosts
[puppet-master-ip] puppetmaster puppet
[puppet-client-ip] puppetclient
步骤3:设置Chrony NTP服务器
安装ntp包:
sudo apt remove ntp
sudo apt -y install chrony
如果要限制哪些系统可以使用ntp服务器,请在/etc/chrony/chrny.conf中添加如下行:
$ sudo vim /etc/chrony/chrony.conf
restrict 192.168.1.0 mask 255.255.255.0 nomodify notrap
用可信网络替换192.168.1.0。
重新启动ntp服务:
sudo systemctl restart chronyd
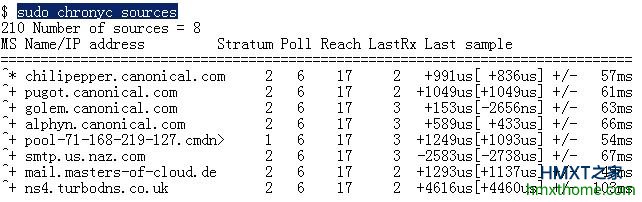
检查ntp状态:
$ sudo chronyc sources
在Ubuntu 20.04上安装Puppet Master
现在,所有先决条件都满足了,继续下载PuppetLabs Ubuntu存储库,并在服务器上安装PuppetMaster。
1、Ubuntu 20.04
sudo apt update
curl -O https://apt.puppet.com/puppet-release-focal.deb
sudo apt install ./puppet-release-focal.deb
2、Ubuntu 18.04
sudo apt update
sudo apt install wget
curl -O https://apt.puppet.com/puppet6-release-bionic.deb
sudo apt install ./puppet6-release-bionic.deb
如果是Ubuntu 22.04,请用https://apt.puppet.com/puppet-release-jammy.deb或https://apt.puppet.com/puppet6-release-jammy.deb。
更新apt索引并安装Puppet Master:
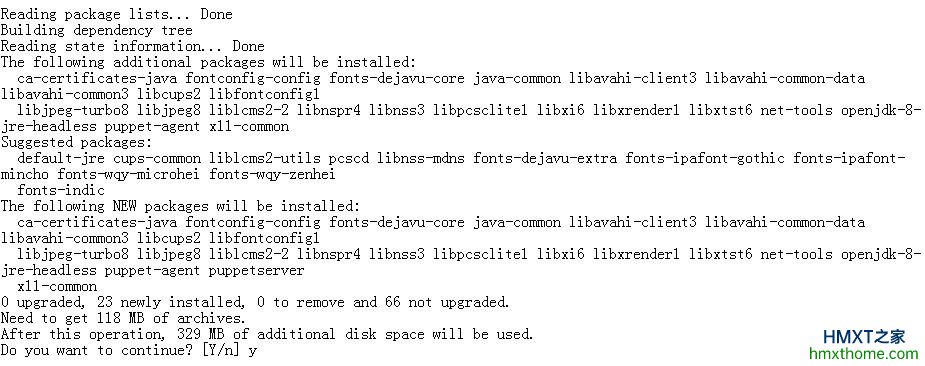
sudo apt update
sudo apt install puppetserver
按y同意开始安装:
确认已安装的版本:
$ apt policy puppetserver
puppetserver:
Installed: 7.2.0-1focal
Candidate: 7.2.0-1focal
Version table:
*** 7.2.0-1focal 500
500 http://apt.puppetlabs.com focal/puppet amd64 Packages
500 http://apt.puppetlabs.com focal/puppet all Packages
100 /var/lib/dpkg/status
启动并启用Puppet服务器服务
sudo systemctl start puppetserver.service
sudo systemctl enable puppetserver.service
在Ubuntu上,服务应该自动启动:
$ systemctl status puppetserver.service
会返回Active: active (running)之类的信息。
在Ubuntu 20.04上配置Puppet Master
安装Puppet Master主服务器后,是时候开始配置了。建议更改Puppet Java进程内存分配基础结构大小。我会分配我的Puppet Master服务器1gb内存。这是通过编辑位于/etc/default/ppuppet-master上的环境文件来完成的:
$ sudo vim /etc/default/puppetserver
JAVA_ARGS="-Xms1024m -Xmx1024m"
进行更改后,重新启动服务器进程:
sudo systemctl restart puppetserver
1、配置防火墙
如果您的Ubuntu系统上有防火墙,则需要打开Puppet主服务使用的端口8140。运行以下命令以允许防火墙上的端口:
sudo ufw allow 8140/tcp
2、配置PATH环境
在bashrc文件中添加以下行:
$ vim ~/.bashrc
export PATH=$PATH:/opt/puppetlabs/bin
获取~/.bashrc文件:
source ~/.bashrc
确认当前的PATH设置:
$ echo $PATH
/usr/local/sbin:/usr/local/bin:/usr/sbin:/usr/bin:/sbin:/bin:/usr/games:/usr/local/games:/snap/bin:/opt/puppetlabs/bin
在托管节点上安装Puppet Agent
在要使用Puppet自动化的节点上安装Puppet Agent:
1]、Ubuntu 20.04
sudo apt update
curl -O https://apt.puppet.com/puppet-release-focal.deb
sudo apt install ./puppet-release-focal.deb
sudo apt update
sudo apt install puppet-agent
2]、Ubuntu 18.04
sudo apt update
sudo apt install wget
curl -O https://apt.puppet.com/puppet6-release-bionic.deb
sudo apt install ./puppet6-release-bionic.deb
sudo apt update
sudo apt install puppet-agent
如果是Ubuntu 22.04,请到https://apt.puppet.com/选择代号为Jammy的deb包。
打开/etc/hosts文件并设置服务器和此代理的名称:
$ sudo vim /etc/hosts
[puppet-master-ip] puppetmaster puppet
[puppet-client-ip] puppetclient
编辑Puppet代理配置文件并添加主服务器DNS替代名称:
$ sudo vim /etc/puppetlabs/puppet/puppet.conf
[server]
vardir = /opt/puppetlabs/server/data/puppetserver
logdir = /var/log/puppetlabs/puppetserver
rundir = /var/run/puppetlabs/puppetserver
pidfile = /var/run/puppetlabs/puppetserver/puppetserver.pid
codedir = /etc/puppetlabs/code
dns_alt_names=puppetmaster,puppetserver
还可以如下配置主部分:
$ sudo vim /etc/puppetlabs/puppet/puppet.conf
[main]
server = puppetmaster
certname = puppetclient
environment = production
runinterval = 1h
现在启动Puppet服务:
sudo systemctl start puppet
sudo systemctl enable puppet
在Puppet Master主节点上列出所有可用的证书:
$ sudo /opt/puppetlabs/bin/puppetserver ca list --all

签署任何待定证书:
sudo /opt/puppetlabs/bin/puppetserver ca sign --all
Puppet Master现在应该能够与Agent节点通信并控制它。通过在代理上运行以下命令进行确认:
$ sudo /opt/puppetlabs/bin/puppet agent --test
Info: Using configured environment 'production'
Info: Retrieving pluginfacts
Info: Retrieving plugin
Info: Caching catalog for puppetmaster
Info: Applying configuration version '1624883476'
Notice: Applied catalog in 0.01 seconds
完成以上操作后,请将Puppet Master二进制文件夹添加到$PATH。
Puppet Master二进制文件位于/opt/puppetlabs/bin中。默认情况下,此目录不在$PATH中。可通过以下方式确认:
$ ls /opt/puppetlabs/bin/
facter hiera puppet puppetserver
$ which puppet
/usr/bin/which: no puppet in (/home/vagrant/.local/bin:/home/vagrant/bin:/usr/local/bin:/usr/bin:/usr/local/sbin:/usr/sbin)
将其添加到PATH:
$ vim ~/.bashrc
export PATH=$PATH:/opt/puppetlabs/bin
$ source ~/.bashrc
$ which puppet
/opt/puppetlabs/bin/puppet
至此,安装和配置Puppet Master和Agent的操作全部完成了。
相关资讯


