更新时间:2022-12-22 15:32:20浏览次数:325+次
本文介绍如何在Ubuntu 20.04 Linux系统上安装和配置MariaDB 10.6的方法。当前可以从MariaDB APT存储库在Ubuntu 20.04和Ubuntu 18.04上安装MariaDB 10.6。
安装和配置MariaDB 10.6的方法,附基本用法
步骤1:系统升级
与往常一样,我们首先运行系统升级,以确保在最新的软件包上执行安装。更新后,重新启动服务器:
sudo apt update
sudo apt upgrade -y
sudo reboot
步骤2:安装所需的软件包
接下来,我们将安装软件属性通用包:
sudo apt install software-properties-common -y
步骤3:导入MariaDB GPG密钥并添加MariaDB APT存储库
分别使用以下命令,我们将添加MariaDB签名密钥并添加MariaDB APT存储库:
curl -LsS -O https://downloads.mariadb.com/MariaDB/mariadb_repo_setup
sudo bash mariadb_repo_setup --mariadb-server-version=10.6
您将得到一个包含如下内容的输出:
[info] Checking for script prerequisites.
[info] Repository file successfully written to /etc/apt/sources.list.d/mariadb.list
[info] Adding trusted package signing keys...
[info] Running apt-get update...
[info] Done adding trusted package signing keys
步骤4:在Ubuntu 20.04、18.04上安装MariaDB 10.6
添加MariaDB密钥和APT存储库后,更新软件包并继续在Ubuntu 20.04、18.04上安装MariaDB 10.6,如果是22.04版本,可参考https://www.hmxthome.com/linux/4845.html里面的文章:
sudo apt update
sudo apt install mariadb-server mariadb-client
步骤5:让MariaDB 10.6更安全
安装MariaDB 10.6后,运行以下MySQL脚本以保护MariaDB,请注意按Y键继续:
$ sudo mariadb-secure-installation
NOTE: RUNNING ALL PARTS OF THIS SCRIPT IS RECOMMENDED FOR ALL MariaDB
SERVERS IN PRODUCTION USE! PLEASE READ EACH STEP CAREFULLY!
In order to log into MariaDB to secure it, we'll need the current
password for the root user. If you've just installed MariaDB, and
haven't set the root password yet, you should just press enter here.
Enter current password for root (enter for none):
OK, successfully used password, moving on...
Setting the root password or using the unix_socket ensures that nobody
can log into the MariaDB root user without the proper authorisation.
You already have your root account protected, so you can safely answer 'n'.
Switch to unix_socket authentication [Y/n] Y
Enabled successfully!
Reloading privilege tables..
... Success!
You already have your root account protected, so you can safely answer 'n'.
Change the root password? [Y/n] Y
New password:
Re-enter new password:
Password updated successfully!
Reloading privilege tables..
... Success!
By default, a MariaDB installation has an anonymous user, allowing anyone
to log into MariaDB without having to have a user account created for
them. This is intended only for testing, and to make the installation
go a bit smoother. You should remove them before moving into a
production environment.
Remove anonymous users? [Y/n] Y
... Success!
Normally, root should only be allowed to connect from 'localhost'. This
ensures that someone cannot guess at the root password from the network.
Disallow root login remotely? [Y/n] Y
... Success!
By default, MariaDB comes with a database named 'test' that anyone can
access. This is also intended only for testing, and should be removed
before moving into a production environment.
Remove test database and access to it? [Y/n] Y
- Dropping test database...
... Success!
- Removing privileges on test database...
... Success!
Reloading the privilege tables will ensure that all changes made so far
will take effect immediately.
Reload privilege tables now? [Y/n] Y
... Success!
Cleaning up...
All done! If you've completed all of the above steps, your MariaDB
installation should now be secure.
Thanks for using MariaDB!
步骤6:确认Mariadb状态
MariaDB服务器应自动启动。检查状态如下:
$ systemctl status mariadb
mariadb.service - MariaDB 10.6.4 database server
Loaded: loaded (/lib/systemd/system/mariadb.service; enabled; vendor preset: enabled)
步骤7:启用MariaDB以在服务器重新启动时启动
运行以下命令以使MariaDB在服务器重新启动时自动启动:
sudo systemctl enable mariadb
步骤8:检查MariaDB版本
要确认安装的版本,我们需要首先登录MySQL,如下所示:
$ mysql -u root -p
Enter password:
Welcome to the MariaDB monitor. Commands end with ; or \g.
Your MariaDB connection id is 32
Server version: 10.6.3-MariaDB-1:10.6.3+maria~focal mariadb.org binary distribution
Copyright (c) 2000, 2018, Oracle, MariaDB Corporation Ab and others.
Type 'help;' or '\h' for help. Type '\c' to clear the current input statement.
MariaDB [(none)]>
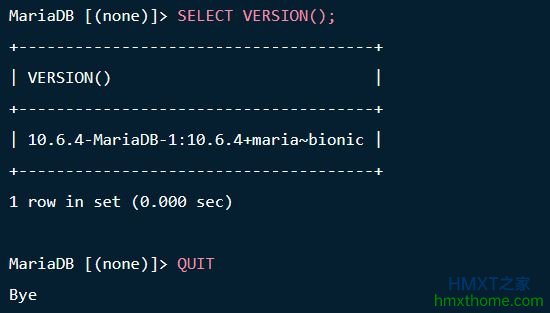
现在运行以下命令检查MariaDB版本:
MariaDB [(none)]> SELECT VERSION();
步骤9:MariaDB基本用法
接下来,我们将看到MariaDB Dabasse的一些基本用法,如创建数据库、用户等。
1、MariaDB创建数据库
MariaDB使用MySQL语法。要创建数据库,首先需要登录到mariadb,然后运行以下命令创建数据库:
#Create a new database
MariaDB [(none)]> CREATE DATABASE db1;
Query OK, 1 row affected (0.000 sec)
#If the database with the same exists
CREATE DATABASE db1;
ERROR 1007 (HY000): Can't create database 'db1'; database exists
#Create a database if already exits
MariaDB [(none)]> CREATE OR REPLACE DATABASE db1;
Query OK, 2 rows affected (0.009 sec)
#First check if a database exists
MariaDB [(none)]> CREATE DATABASE IF NOT EXISTS db1;
Query OK, 1 row affected, 1 warning (0.000 sec)
# Check Databases MariaDB
MariaDB [(none)]> SHOW DATABASES;
2、MariaDB添加用户和授予权限
创建用户并授予权限:
#Create user mariadb
MariaDB [(none)]> CREATE USER 'db1user'@'localhost' IDENTIFIED BY 'mypassword';
#Grant privileges to a specific database
MariaDB [(none)]> GRANT ALL PRIVILEGES ON db1.* TO 'db1user'@'localhost';
#Remember to refresh the privileges
MariaDB [(none)]> FLUSH privileges;
#To check user grants in MariaDB
MariaDB [(none)]> SHOW GRANTS FOR 'db1user'@'localhost';
3、创建表并添加数据MariaDB
创建数据库后,可以创建表并向其中添加数据:
MariaDB [(none)]> USE db1;
MariaDB [(none)]> CREATE TABLE employees (id INT, name VARCHAR(20), email VARCHAR(20));
MariaDB [(none)]> INSERT INTO employees (id,name,email) VALUES(01,"User1","user1@example.com");
4、MariaDB清理
如果您想彻底清理MariaDB安装,可以删除并重新安装:
sudo apt purge mariadb-server
sudo rm -rf /var/lib/mysql/
到这里,MariaDB的基本用法就讲完了。做完以上操作,就意味着在Ubuntu 20.04上安装和配置MariaDB 10.6成功完成了。
相关资讯


