更新时间:2023-01-16 10:17:30浏览次数:626+次
本文介绍如何在Debian 11/Debian 10系统上安装和使用Podman 4版本的方法,将演示使用它来获取images和运行容器。
请按以下方法操作
1、安装所需的工具
可以从Podman存储库安装Podman,但可用版本为Podman 3。要安装Podman 4,我们需要从源代码构建它。
在开始之前,请确保您的系统和可用软件包已更新到最新版本:
sudo apt update && sudo apt upgrade -y
您还需要安装从源代码构建Podman所需的工具:
sudo apt install btrfs-progs git iptables libassuan-dev libbtrfs-dev libc6-dev libdevmapper-dev libglib2.0-dev libgpgme-dev libgpg-error-dev libprotobuf-dev libprotobuf-c-dev libseccomp-dev libselinux1-dev libsystemd-dev pkg-config runc uidmap make curl vim gcc -y
2、安装Golang
要从源代码构建Podman,需要Golang 1.16及更高版本。这个版本可以通过从Golang发布页面下载二进制文件来安装,地址在https://golang.org/dl/。或者,使用以下命令下载文件:
sudo -i
wget https://storage.googleapis.com/golang/getgo/installer_linux
使脚本可执行:
chmod +x ./installer_linux
现在运行安装程序下载Golang版本:
./installer_linux
将新的环境变量持久化到当前会话:
source ~/.bash_profile
验证安装:
# go version
go version go1.19.1 linux/amd64
3、安装runc和Conmon
Conmon模块用于监控OCI运行时间。可以使用以下命令安装:
cd ~
git clone https://github.com/containers/conmon
cd conmon
export GOCACHE="$(mktemp -d)"
make
sudo make podman
cd ..
安装完成后,继续安装runc,它被Podman选为默认运行时:
git clone https://github.com/opencontainers/runc.git $GOPATH/src/github.com/opencontainers/runc
cd $GOPATH/src/github.com/opencontainers/runc
make BUILDTAGS="selinux seccomp"
cp runc /usr/bin/runc
cd ~/
验证您的安装:
# runc --version
runc version 1.1.0+dev
commit: v1.1.0-272-g4a51b047
spec: 1.0.2-dev
go: go1.19
libseccomp: 2.5.1
4、配置CNI网络插件
创建一个目录,将CNI网络插件存储在/etc/containers中:
sudo mkdir -p /etc/containers
将配置文件下载到目录中:
sudo curl -L -o /etc/containers/registries.conf https://src.fedoraproject.org/rpms/containers-common/raw/main/f/registries.conf
sudo curl -L -o /etc/containers/policy.json https://src.fedoraproject.org/rpms/containers-common/raw/main/f/default-policy.json
在Debian 11/Debian 10上安装其他软件包:
sudo apt install -y libapparmor-dev libsystemd-dev
5、在Debian 11/Debian 10上安装Podman 4
完成以上所有配置后,下载Podman源代码。这可以通过访问GitHub发布页面来完成,地址在https://github.com/containers/podman/releases,还可以使用以下命令下载文件:
sudo apt install curl wget -y
TAG=$(curl -s https://api.github.com/repos/containers/podman/releases/latest|grep tag_name|cut -d '"' -f 4)
rm -rf podman*
wget https://github.com/containers/podman/archive/refs/tags/${TAG}.tar.gz
提取下载的文件:
tar xvf ${TAG}.tar.gz
现在使用以下命令从源代码构建并安装Podman 4:
cd podman*/
make BUILDTAGS="selinux seccomp"
make install PREFIX=/usr
完成后,验证安装:
$ podman version
Client:Podman Engine
Version:4.2.1
API Version:4.2.1
Go Version:go1.19.1
OS/Arch:linux/amd64
为了能够配置网络名称空间,您需要安装slirp4netns包。从GitHub release下载最新版本文件,地址在https://github.com/rootless-containers/slirp4netns/releases。
或者,使用cURL:
cd ~/
TAG=$( curl -s https://api.github.com/repos/rootless-containers/slirp4netns/releases/latest|grep tag_name|cut -d '"' -f 4)
curl -o slirp4netns --fail -L https://github.com/rootless-containers/slirp4netns/releases/download/$TAG/slirp4netns-$(uname -m)
使文件可执行:
chmod +x slirp4netns
将二进制文件复制到$PATH:
sudo cp slirp4netns /usr/local/bin
6、在Debian 11/Debian 10上使用Podman 4
现在,您可以使用Podman轻松构建和pull images、旋转容器和管理它们。
1]、管理容器图像
要拉取图像,请使用具有以下语法的命令:
podman pull <registry/image:tag>
例如,要从docker hub中提取Nginx image,命令如下:
$ podman pull docker.io/library/nginx:latest
Trying to pull docker.io/library/nginx:latest...
Getting image source signatures
Copying blob 7247f6e5c182 done
Copying blob 7247f6e5c182 done
Copying blob 7a6db449b51b done
Copying blob ca1981974b58 done
Copying blob d4019c921e20 done
Copying blob 7cb804d746d4 done
Copying blob e7a561826262 done
Copying config 2b7d6430f7 done
Writing manifest to image destination
拉动后,您可以使用以下命令查看图像:
$ podman images

您可以使用以下命令从dockerhub删除一个容器图像,例如ubuntu:latest:
$ podman rmi docker.io/library/ubuntu:latest
Untagged: docker.io/library/ubuntu:latest
在删除图像之前,需要确保已停止并删除使用该图像的容器。
2]、生成容器图像
还可以构建获胜容器图像。这些图像可以在本地使用,也可以上传到注册表。
要在Podman上创建容器映像,需要创建Dockerfile:
vim Dockerfile
在文件中,您需要添加要执行的命令。例如:
FROM ubuntu:20.04
RUN apt-get up date -y
ENV DEBIAN_FRONTEND=noninteractive
RUN apt-get install -y gnupg apt-transport-https apt-utils wget
RUN echo "deb https://notesalexp.org/tesseract-ocr5/focal/ focal main" \
|tee /etc/apt/sources.list.d/notesalexp.list > /dev/null
RUN wget -O - https://notesalexp.org/debian/alexp_key.asc | apt-key add -
RUN apt-get update -y
RUN apt-get install tesseract-ocr -y
RUN apt install imagemagick -y
ENTRYPOINT ["tesseract"]
RUN tesseract -v
现在使用以下命令构建容器映像:
podman build . -t tesseract:latest
构建映像将具有名称tesseract并标记为最新。完成后,检查图像是否可用:
$ podman images

3]、管理容器
可以从现有图像或从首选注册表下载图像来运行容器。
例如,要从创建的Teseract图像运行容器,请发出以下命令:
$ podman run tesseract:latest -v
tesseract 5.2.0
leptonica-1.79.0
libgif 5.1.4 : libjpeg 8d (libjpeg-turbo 2.0.3) : libpng 1.6.37 : libtiff 4.1.0 : zlib 1.2.11 : libwebp 0.6.1 : libopenjp2 2.3.1
Found OpenMP 201511
Found libarchive 3.4.0 zlib/1.2.11 liblzma/5.2.4 bz2lib/1.0.8 liblz4/1.9.2 libzstd/1.4.4
Found libcurl/7.68.0 OpenSSL/1.1.1f zlib/1.2.11 brotli/1.0.7 libidn2/2.2.0 libpsl/0.21.0 (+libidn2/2.2.0) libssh/0.9.3/openssl/zlib nghttp2/1.40.0 librtmp/2.3
您还可以使用注册表中可用的图像运行容器:
podman run docker.io/library/hello-world
样本输出:
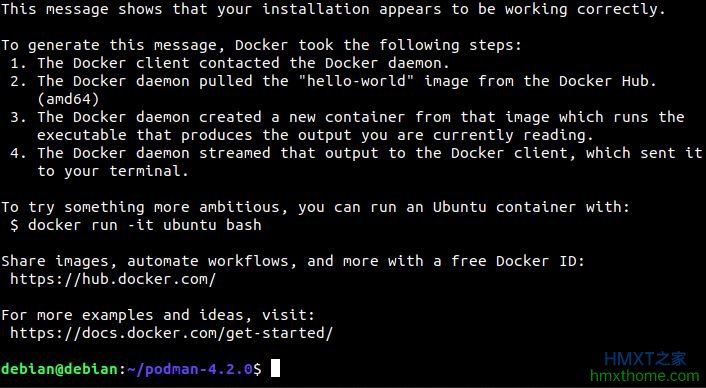
要检查容器是否正在运行,请使用以下命令:
podman ps
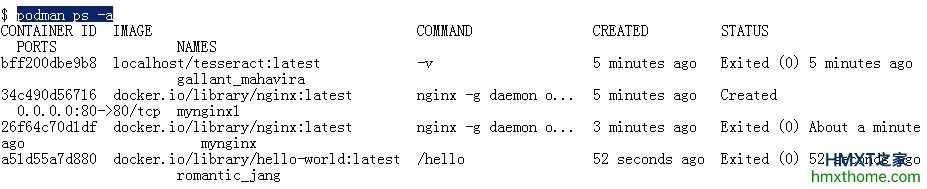
要列出所有容器,包括未运行的容器,请发出以下命令:
$ podman ps -a
要停止容器,请运行以下命令:
podman stop container_name/container_ID
要删除容器,首先停止它,然后执行以下命令:
podman rm container_name/container_ID
至此,在Debian 11/Debian 10系统上安装Podman 4完成,现在,您已设置为根据需要提取images并运行容器。
相关资讯


