更新时间:2023-01-20 16:06:40浏览次数:638+次
本文介绍如何在Rocky Linux 9/AlmaLinux 9系统上安装和配置GitLab的方法。对于设置要求,您需要主机上1GB或更多可用RAM、完全限定的域名(用于SSL证书)、具有sudo权限的用户。
安装和配置GitLab的方法
1、安装所需的软件包
我们将首先将可用软件包更新为最新可用版本:
sudo dnf -y update
安装所需的包依赖项:
sudo dnf -y install curl vim policycoreutils python3-policycoreutils git
2、在Rocky Linux 9/AlmaLinux 9上添加GitLab CE存储库
默认的Rocky Linux 9/AlmaLinux 9存储库不提供GitLab。为了能够安装它,我们需要将官方存储库添加到我们的系统中。
要在Rocky Linux 9/AlmaLinux 9上添加GitLab CE Repository,请使用以下命令:
sudo vim /etc/yum.repos.d/gitlab_gitlab-ce.repo
将以下行添加到文件中:
[gitlab_gitlab-ce]
name=gitlab_gitlab-ce
baseurl=https://packages.gitlab.com/gitlab/gitlab-ce/el/8/$basearch
repo_gpgcheck=1
gpgcheck=1
enabled=1
gpgkey=https://packages.gitlab.com/gitlab/gitlab-ce/gpgkey
https://packages.gitlab.com/gitlab/gitlab-ce/gpgkey/gitlab-gitlab-ce-3D645A26AB9FBD22.pub.gpg
sslverify=1
sslcacert=/etc/pki/tls/certs/ca-bundle.crt
metadata_expire=300
[gitlab_gitlab-ce-source]
name=gitlab_gitlab-ce-source
baseurl=https://packages.gitlab.com/gitlab/gitlab-ce/el/8/SRPMS
repo_gpgcheck=1
gpgcheck=1
enabled=1
gpgkey=https://packages.gitlab.com/gitlab/gitlab-ce/gpgkey
https://packages.gitlab.com/gitlab/gitlab-ce/gpgkey/gitlab-gitlab-ce-3D645A26AB9FBD22.pub.gpg
sslverify=1
sslcacert=/etc/pki/tls/certs/ca-bundle.crt
metadata_expire=300
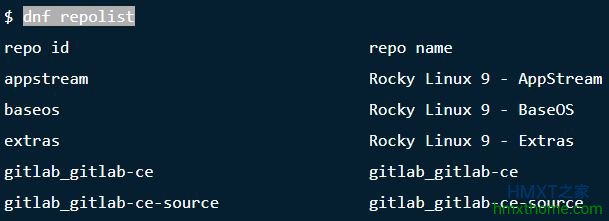
验证是否已添加存储库:
$ dnf repolist
3、在Rocky Linux 9/AlmaLinux 9上安装GitLab CE
将存储库添加到系统后,在Rocky Linux 9/AlmaLinux 9上安装GitLab CE,如下所示:
sudo dnf install gitlab-ce -y
Total download size: 1.1 G
Installed size: 16 E
Is this ok [y/N]: y
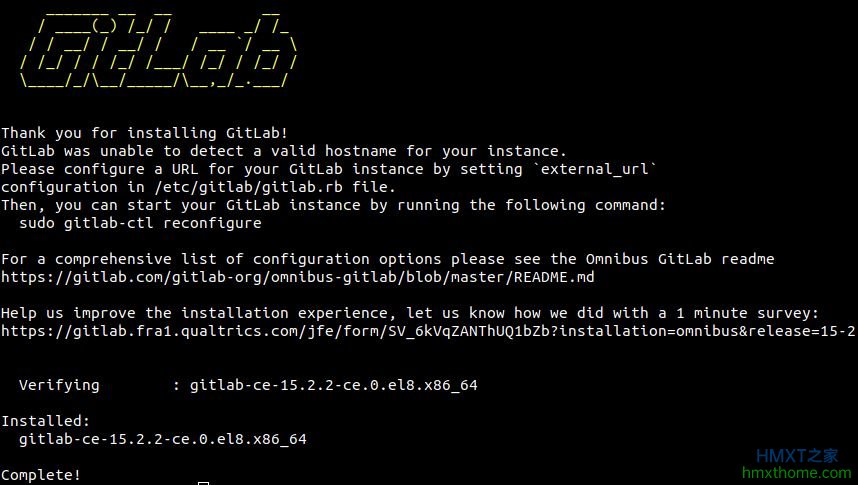
安装完成后,您将看到:
4、配置GitLab CE
GitLab将其配置文件存储在/etc/gitlab/gitlab.rb中,我们需要将配置编辑为适合我们环境的变量。
打开文件进行编辑:
sudo vim /etc/gitlab/gitlab.rb
在文件中,编辑以下变量:
external_url 'http://gitlab.example.com'
将gitlab.example.com替换为GitLab的域名。滚动并进行任何其他所需的配置。完成后,保存文件并使用以下命令应用更改:
sudo gitlab-ctl reconfigure
样本输出:
Default admin account has been configured with following details:
Username: root
Password: You didn't opt-in to print initial root password to STDOUT.
Password stored to /etc/gitlab/initial_root_password. This file will be cleaned up in first reconfigure run after 24 hours.
验证GitLab是否正在运行:
$ sudo gitlab-ctl status
run: alertmanager: (pid 35396) 72s; run: log: (pid 35072) 168s
run: gitaly: (pid 35425) 67s; run: log: (pid 34222) 341s
run: gitlab-exporter: (pid 35373) 74s; run: log: (pid 34861) 201s
run: gitlab-kas: (pid 35350) 76s; run: log: (pid 34540) 308s
run: gitlab-workhorse: (pid 35362) 75s; run: log: (pid 34711) 230s
run: grafana: (pid 35408) 71s; run: log: (pid 35260) 105s
run: logrotate: (pid 34114) 355s; run: log: (pid 34122) 354s
run: nginx: (pid 34754) 226s; run: log: (pid 34764) 222s
run: node-exporter: (pid 35369) 75s; run: log: (pid 34825) 212s
run: postgres-exporter: (pid 35402) 71s; run: log: (pid 35120) 161s
run: postgresql: (pid 34376) 321s; run: log: (pid 34397) 319s
run: prometheus: (pid 35380) 74s; run: log: (pid 35019) 178s
run: puma: (pid 34618) 249s; run: log: (pid 34626) 246s
run: redis: (pid 34160) 349s; run: log: (pid 34169) 347s
run: redis-exporter: (pid 35375) 74s; run: log: (pid 34890) 189s
run: sidekiq: (pid 34646) 243s; run: log: (pid 34662) 240s
您可以使用以下命令停止和启动Gitlab:
sudo gitlab-ctl stop
sudo gitlab-ctl start
允许HTTP/HTTPS和SSH服务通过防火墙:
sudo firewall-cmd --permanent --add-service={ssh,http,https} --permanent
sudo firewall-cmd --reload
5、访问GitLab Web控制台
现在可以使用提供的URL访问Gitlab地址http://gitlab.example.com,使用以下命令获取root密码:
$ sudo cat /etc/gitlab/initial_root_password
# WARNING: This value is valid only in the following conditions
# 1. If provided manually (either via `GITLAB_ROOT_PASSWORD` environment variable or via `gitlab_rails['initial_root_password']` setting in `gitlab.rb`, it was provided before database was seeded for the first time (usually, the first reconfigure run).
# 2. Password hasn't been changed manually, either via UI or via command line.
#
# If the password shown here doesn't work, you must reset the admin password following https://docs.gitlab.com/ee/security/reset_user_password.html#reset-your-root-password.
Password: w5hNDOCgqHmv+ZNMdfeOcgzNAEXlh39bbloli3jVpBA=
# NOTE: This file will be automatically deleted in the first reconfigure run after 24 hours.
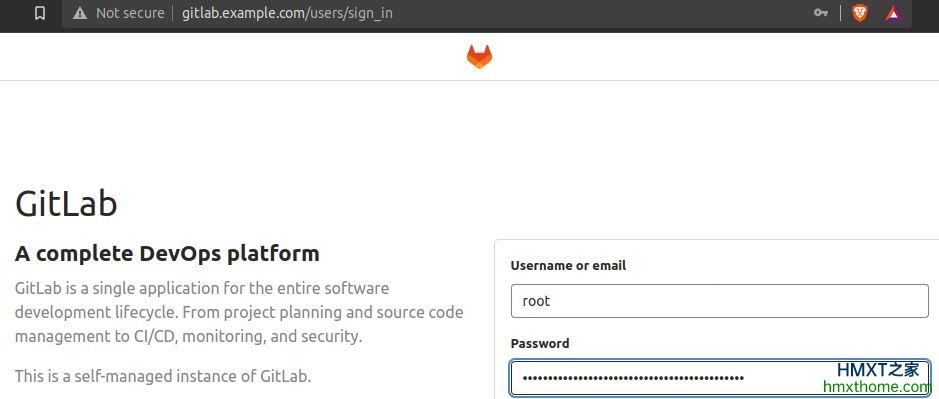
现在按如下所示登录:
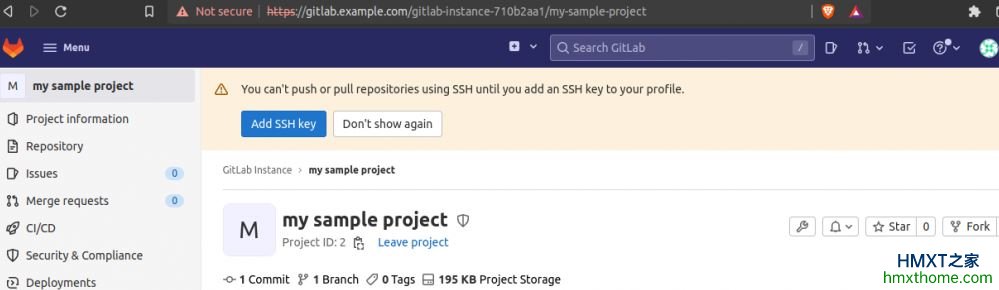
成功登录后,您将看到下面的仪表板。通过禁用/启用用户注册,设置您是否希望该帐户供所有人使用或供个人使用:

现在在管理区域中将根密码更改为首选密码。设置完成后,单击新建项目创建新项目:

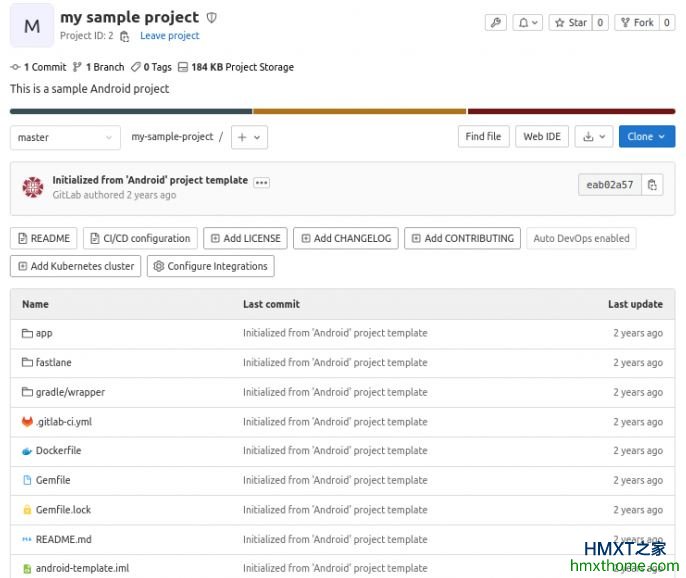
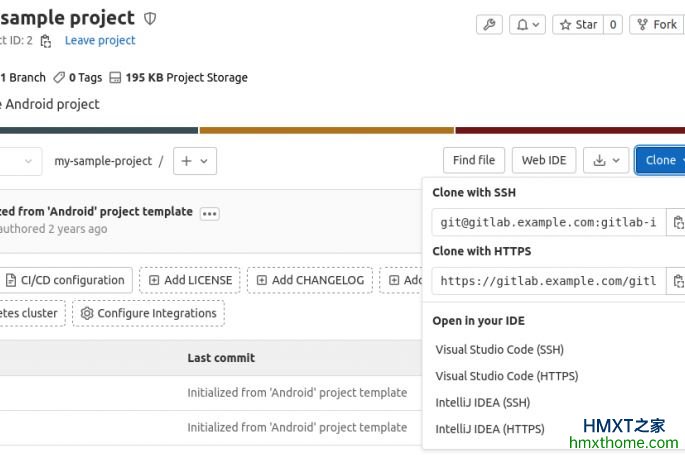
提供了三个选项:创建空白项目、导入或使用模板创建,可根据自身情况进行选择,可使用模板。创建项目后,将显示如下所示:
另外,从命令行,您可以使用SSH密钥或HTTP/HTTPS克隆到repo。
6、使用SSL证书保护GitLab
使用SSL保护GitLab可以防止未经授权访问您的数据。这可以通过生成自签名或Let's Encrypt证书来完成,如下所示。
选项1、生成自签名证书
使用OpenSSL生成私钥:
openssl genrsa -out gitlab.key 2048
创建证书签名请求(CSR):
openssl req -new -key gitlab.key -out gitlab.csr
现在签署证书:
openssl x509 -req -days 3650 -in gitlab.csr -signkey gitlab.key -out gitlab.crt
现在您将生成一个密钥对,将密钥复制到/etc/gitlab/可信证书:
sudo mkdir /etc/gitlab/ssl/
sudo cp gitlab.crt gitlab.key /etc/gitlab/ssl/
选项2、生成Let's Encrypt证书
如果您有完全限定的域名,您可以免费使用Let's Encrypt。默认情况下,这是禁用的,如下所示:

编辑GitLab配置文件:
sudo vim /etc/gitlab/gitlab.rb
在第2481行周围,取消注释Let's Encrypt行:
letsencrypt['enable'] = true
letsencrypt['contact_emails'] = ['myemail@gmail.com'] # This should be an array of email addresses to add as contacts
letsencrypt['auto_renew'] = true
为域名生成受信任的SSL证书:
sudo gitlab-ctl reconfigure
接下来,配置GitLab以使用SSL证书。要让GitLab使用生成的证书,请编辑配置文件:
sudo vim /etc/gitlab/gitlab.rb
进行以下更改并适当提供证书路径:
external_url 'https://gitlab.example.com'
## GitLab NGINX
##! Docs: https://docs.gitlab.com/omnibus/settings/nginx.html
nginx['enable'] = true
nginx['redirect_http_to_https'] = true
对于自签名证书,请提供证书路径:
nginx['ssl_certificate'] = "/etc/gitlab/ssl/gitlab.crt"
nginx['ssl_certificate_key'] = "/etc/gitlab/ssl/gitlab.key"
保存文件并重新配置GitLab:
sudo gitlab-ctl reconfigure
使用HTTPS访问GitLab:
至此,在Rocky Linux 9/AlmaLinux 9操作系统上安装和配置GitLab全部完成。
相关资讯


