更新时间:2023-02-01 16:13:39浏览次数:497+次
本文介绍如何在Ubuntu/Debian/CentOS/RHEL系统上使用Ansible部署Graylog服务器的方法。最主要的优势是使用Ansible部署Graylog Server可以轻松地自动化递归任务。
具体操作方法
步骤1、安装和配置Ansible
Ansible可以使用多种方法安装在控制节点上。在任何Linux发行版上安装它的最简单方法是使用PIP。在继续使用此方法之前,需要安装Python和PIP。
##在Ubuntu上
sudo apt update
sudo apt install python3 python3-pip -y
##CentOS上
sudo yum install python3 python3-pip -y
现在使用已安装的PIP安装Ansible:
sudo pip3 install ansible
如果是在macOS上,您可以使用brew安装Ansible:
brew install ansible
验证安装:
$ ansible --version
ansible [core 2.12.4]
config file = None
configured module search path = ['/home/ubuntu/.ansible/plugins/modules', '/usr/share/ansible/plugins/modules']
ansible python module location = /usr/local/lib/python3.8/dist-packages/ansible
ansible collection location = /home/ubuntu/.ansible/collections:/usr/share/ansible/collections
executable location = /usr/local/bin/ansible
python version = 3.8.10 [GCC 9.4.0]
jinja version = 2.10.1
libyaml = True
Ansible也可以从默认软件包存储库安装:
##在Ubuntu/Debian上
sudo apt install ansible
##CentOS上
sudo yum install epel-release
sudo yum install ansible
下面创建Ansible主机资源库存文件。此文件由Ansible控制节点管理的节点组成:
$ sudo vim /etc/ansible/hosts
[graylog]
192.168.205.9 ansible_ssh_user=username
将下面命令中的“username”替换为受管节点上的用户名。生成受管节点的SSH密钥并将其复制到控制节点:
ssh-keygen -t rsa
ssh-copy-id -i ~/.ssh/id_rsa.pub username@192.168.205.9
这将允许您无需密码即可控制添加的节点。测试是否有效:
$ ansible -m ping all
192.168.205.9 | SUCCESS => {
"ansible_facts": {
"discovered_interpreter_python": "/usr/libexec/platform-python"
},
"changed": false,
"ping": "pong"
}
步骤2、安装Graylog Ansible角色
Graylog Ansible角色允许安装和配置Graylog。可以使用以下命令安装:
$ ansible-galaxy install graylog2.graylog
Starting galaxy role install process
- downloading role 'graylog', owned by graylog2
- downloading role from https://github.com/Graylog2/graylog-ansible-role/archive/3.3.7.tar.gz
- extracting graylog2.graylog to /Users/jkmutai/.ansible/roles/graylog2.graylog
- graylog2.graylog (3.3.7) was installed successfully
- adding dependency: lean_delivery.java (7.1.0)
- adding dependency: elastic.elasticsearch (main)
- downloading role 'java', owned by lean_delivery
- downloading role from https://github.com/lean-delivery/ansible-role-java/archive/7.1.0.tar.gz
- extracting lean_delivery.java to /Users/jkmutai/.ansible/roles/lean_delivery.java
- lean_delivery.java (7.1.0) was installed successfully
- extracting elastic.elasticsearch to /Users/jkmutai/.ansible/roles/elastic.elasticsearch
- elastic.elasticsearch (main) was installed successfully
从上面的输出中,您将注意到已经安装了Java和Elasticsearch依赖项:
使用以下命令验证是否已安装Graylog Ansible角色依赖项:
ansible-galaxy install -r ~/.ansible/roles/graylog2.graylog/requirements.yml
记住用Graylog Ansible角色的正确路径替换~/.ansible/roles/graylog2.graylog/。
步骤3、使用Ansible角色部署Graylog服务器
为single-instance Graylog服务器安装创建playbook YAML:
vim graylog-playbook.yaml
文件将包含以下行:
- hosts: "graylog"
remote_user: "username"
become: True
vars:
#Elasticsearch vars
es_major_version: "7.x"
es_version: "7.10.2"
es_enable_xpack: False
es_instance_name: "graylog"
es_heap_size: "1g"
es_config:
node.name: "graylog"
cluster.name: "graylog"
http.port: 9200
transport.tcp.port: 9300
network.host: "127.0.0.1"
discovery.seed_hosts: "localhost:9300"
cluster.initial_master_nodes: "graylog"
oss_version: True
es_action_auto_create_index: False
#Graylog vars
graylog_version: 4.2
graylog_install_java: True
graylog_password_secret: "ncc4jque0VvGImadZ7jzX26NrESt30dY4U4nNfZWAXubcvUGDKnMjbC4eEAU0KcfWX6CDk4ME80CrYPP9ErpvyFPXc2H2xKf" # Insert your own here. Generate with: pwgen -s 96 1
graylog_root_password_sha2: "434e27fac24a15cbf8b160b7b28c143a67d9e6939cbb388874e066e16cb32d75" # Insert your own root_password_sha2 here.
graylog_http_bind_address: "{{ ansible_default_ipv4.address }}:9000"
graylog_http_publish_uri: "http://{{ ansible_default_ipv4.address }}:9000/"
graylog_http_external_uri: "http://{{ ansible_default_ipv4.address }}:9000/"
roles:
- role: "graylog2.graylog"
tags:
- "graylog"
请记住替换使用以下命令生成的graylog_password_secret:
$ pwgen -N 1 -s 96
ncc4jque0VvGImadZ7jzX26NrESt30dY4U4nNfZWAXubcvUGDKnMjbC4eEAU0KcfWX6CDk4ME80CrYPP9ErpvyFPXc2H2xKf
此外,替换使用以下命令生成的graylog_root_password_sha2:
$ echo -n "Enter Password: " && head -1 </dev/stdin | tr -d '\n' | sha256sum | cut -d" " -f1
Enter Password: Str0ngPassw0rd
434e27fac24a15cbf8b160b7b28c143a67d9e6939cbb388874e066e16cb32d75
现在部署Graylog服务器:
ansible-playbook graylog-playbook.yaml
##使用自定义库存文件###
ansible-playbook graylog-playbook.yaml -i myinventory
样本输出:
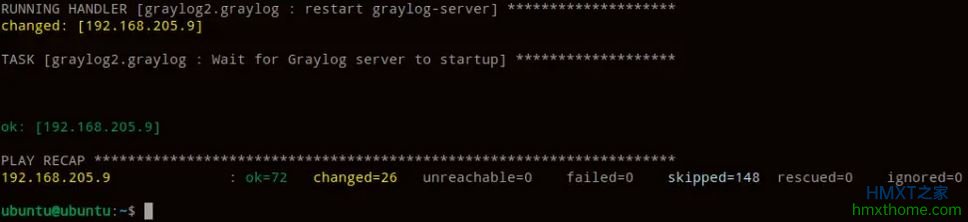
如果上述命令因“缺少sudo密码(Missing sudo password)”而失败,则需要在托管主机上编辑/etc/sudoers文件,并允许远程用户在没有密码的情况下执行sudo命令。
命令后,所有3个服务(MongoDB、Elasticsearch和Graylog)都应在托管节点上运行。
验证Elasticsearch是否正在运行:
$ curl -X GET localhost:9200
{
"name" : "graylog",
"cluster_name" : "graylog",
"cluster_uuid" : "O6qVFbgjQvmTDZ3j-cAVSg",
"version" : {
"number" : "7.10.2",
"build_flavor" : "oss",
"build_type" : "rpm",
"build_hash" : "747e1cc71def077253878a59143c1f785afa92b9",
"build_date" : "2023-02-01T00:42:12.435326Z",
"build_snapshot" : false,
"lucene_version" : "8.7.0",
"minimum_wire_compatibility_version" : "6.8.0",
"minimum_index_compatibility_version" : "6.0.0-beta1"
},
"tagline" : "You Know, for Search"
}
下面可以使用Ansible部署Graylog集群(HA可选)。还可以部署具有更多Elasticsearch和Graylog实例的Graylog集群。下面的示例包括3个Elasticsearch和3个Graylog实例。
首先部署Elasticsearch集群:
- hosts: "elasticsearch"
vars:
es_major_version: "7.x"
es_version: "7.10.2"
es_enable_xpack: False
es_instance_name: "graylog"
es_heap_size: "1g"
es_config:
node.name: "{{ ansible_hostname }}"
cluster.name: "graylog"
http.port: 9200
transport.port: 9300
network.host: "0.0.0.0"
discovery.seed_hosts: "elasticsearch01:9300, elasticsearch02:9300, elasticsearch03:9300"
cluster.initial_master_nodes: "elasticsearch01, elasticsearch02, elasticsearch03"
oss_version: True
es_action_auto_create_index: False
roles:
- role: "elastic.elasticsearch"
然后继续并部署MongoDB实例:
- hosts: "graylog"
vars:
mongodb_version: "4.4"
bind_ip: "0.0.0.0"
repl_set_name: "rs0"
authorization: "disabled"
roles:
- community.mongodb.mongodb_repository
- community.mongodb.mongodb_mongod
tasks:
- name: "Start MongoDB"
service:
name: "mongod"
state: "started"
enabled: "yes"
- hosts: "graylog01"
tasks:
- name: "Install PyMongo"
apt:
update_cache: yes
name: "python3-pymongo"
state: "latest"
- name: Configure replicaset
community.mongodb.mongodb_replicaset:
login_host: "localhost"
replica_set: "rs0"
members:
- graylog01
- graylog02
- graylog03
最后,部署Graylog实例:
- hosts: "graylog"
vars:
graylog_is_master: "{{ True if ansible_hostname == 'graylog01' else False }}"
graylog_version: 4.2
graylog_install_java: False
graylog_install_elasticsearch: False
graylog_install_mongodb: False
graylog_password_secret: "" # Insert your own here. Generate with: pwgen -s 96 1
graylog_root_password_sha2: "" # Insert your own root_password_sha2 here.
graylog_http_bind_address: "{{ ansible_default_ipv4.address }}:9000"
graylog_http_publish_uri: "http://{{ ansible_default_ipv4.address }}:9000/"
graylog_http_external_uri: "http://{{ ansible_default_ipv4.address }}:9000/"
graylog_elasticsearch_hosts: "http://elasticsearch01:9200,http://elasticsearch02:9200,http://elasticsearch03:9200"
graylog_mongodb_uri: "mongodb://graylog01:27017,graylog02:27017,graylog03:27017/graylog"
roles:
- role: "graylog2.graylog"
这样,您将拥有一个带有3个Elasticsearch和3个Graylog实例的Graylog集群。
步骤4、访问Graylog Web界面
现在允许端口9000通过防火墙:
##用于防火墙
sudo firewall-cmd --add-port=9000/tcp --permanent
sudo firewall-cmd --reload
##对于UFW
sudo ufw allow 9000/tcp
继续并使用URL访问Graylog Web界面,地址格式为http://IP_adrress:9000,如下图:

使用默认用户admin和密码(使用graylog_root_password_sha2设置)登录。成功验证后,您应该能够访问下面的仪表板:
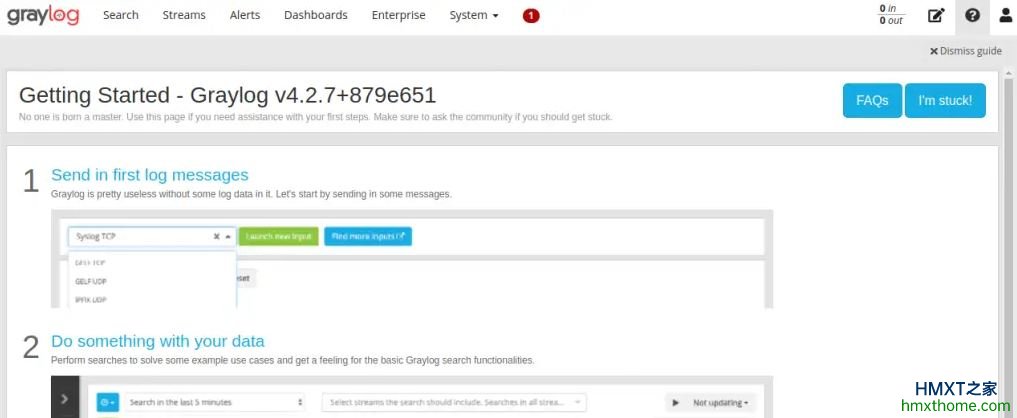
现在继续并配置输入,在Graylog web界面上创建仪表板可视化日志。
结语
根据以上操作步骤,我们已经成功地在Ubuntu/Debian/CentOS上部署了具有Ansible角色的Graylog服务器。最大的优势是,Ansible使在多个服务器上运行重复任务变得容易。
相关资讯


