更新时间:2023-02-03 11:02:35浏览次数:731+次
本文介绍如何在Rocky Linux 8/AlmaLinux 8系统上安装和配置WildFly的方法。
前言
WildFly最初被称为JBoss Application Server,是JEE(Java Enterprise Edition)容器的一种非常快速、轻量级的开源实现。WildFly是用Java编写的,由RedHat开发,用于帮助管理应用程序运行时和构建应用程序。该工具由JBoss Inc于2006年开发,后来被RedHat收购,成为WildFly。当前它可以在支持32位和64位的多个操作系统上运行。
对于本指南,您需要以下内容:
在计算机上安装有Rocky Linux 8/AlmaLinux 8。
内存超过2GB RAM。
此外,请确保系统上的软件包已更新到其最新可用版本:
sudo yum update
使用以下步骤在Rocky Linux 8/AlmaLinux 8上安装WildFly
步骤1、安装Java
由于WildFly是基于Java构建的,因此我们需要在继续之前安装Java。在本指南中,我们将安装Java OpenJDK 11:
sudo yum install java-11-openjdk-devel
安装后,验证Java版本:
$ java -version
openjdk version "11.0.14.1"
步骤2、安装WildFly
在下载和安装WildFly之前,我们需要为WildFly创建系统用户和组。使用自定义主目录创建用户,如下所示:
sudo useradd -r -d /opt/wildfly -s /sbin/nologin wildfly
现在继续从官方WildFly网站下载最新版本的WildFly,地址在https://www.wildfly.org/downloads/。对于本指南,我们将使用Wget下载Jarkata EE Full和Web分发TGZ文件,如下所示:
sudo yum -y install wget curl
WILDFLY_RELEASE=$(curl -s https://api.github.com/repos/wildfly/wildfly/releases/latest|grep tag_name|cut -d '"' -f 4)
wget https://github.com/wildfly/wildfly/releases/download/${WILDFLY_RELEASE}/wildfly-${WILDFLY_RELEASE}.tar.gz
下载后,提取文件:
tar xvf wildfly-${WILDFLY_RELEASE}.tar.gz
将创建的文件夹移动到/opt目录:
sudo mv wildfly-${WILDFLY_RELEASE} /opt/wildfly
将文件的所有权设置为创建的Wildfly用户:
sudo chown -RH wildfly:wildfly /opt/wildfly
步骤3、为WildFly创建Systemd服务
我们将首先在/etc/目录中创建WildFly配置,如下所示:
sudo mkdir /etc/wildfly
sudo cp /opt/wildfly/docs/contrib/scripts/systemd/wildfly.conf /etc/wildfly/
查看配置的内容:
$ cat /etc/wildfly/wildfly.conf
#要运行的配置
WILDFLY_CONFIG=standalone.xml
#要运行的模式
WILDFLY_MODE=standalone
#要绑定到的地址
WILDFLY_BIND=0.0.0.0
从上面的输出中,我们可以同意默认情况下WildFly以独立模式运行,但您仍然可以根据自己的喜好进行自定义。
接下来复制launch.sh脚本,该脚本是将WildFly作为服务启动所需的:
sudo cp /opt/wildfly/docs/contrib/scripts/systemd/launch.sh /opt/wildfly/bin/
现在复制WildFly的服务文件:
sudo cp /opt/wildfly/docs/contrib/scripts/systemd/wildfly.service /usr/lib/systemd/system/
您还需要一个目录来保存PID文件:
sudo mkdir /var/run/wildfly/
sudo chown -R wildfly:wildfly /var/run/wildfly/
现在,在Rocky Linux 8、AlmaLinux 8上启动并启用WildFly:
sudo systemctl enable wildfly.service
sudo systemctl start wildfly.service
检查服务状态:
$ systemctl status wildfly.service
wildfly.service - The WildFly Application Server
配置firewall以允许WildFly端口通过防火墙:
sudo firewall-cmd --permanent --add-port=8080/tcp
sudo firewall-cmd --reload
此时,WildFly应该可以在端口8080上访问。
步骤4、为远程访问配置WildFly管理控制台
默认情况下,WildFly管理控制台在本地主机上运行。如果我们想通过远程主机访问它,我们需要进行一些配置。
首先,我们需要创建一个管理用户,以使我们能够登录到WildFly管理控制台:
$ sudo /opt/wildfly/bin/add-user.sh
What type of user do you wish to add?
a) Management User (mgmt-users.properties)
b) Application User (application-users.properties)
(a): a
Enter the details of the new user to add.
Using realm 'ManagementRealm' as discovered from the existing property files.
Username : klinsmann
Password recommendations are listed below. To modify these restrictions edit the add-user.properties configuration file.
- The password should be different from the username
- The password should not be one of the following restricted values {root, admin, administrator}
- The password should contain at least 8 characters, 1 alphabetic character(s), 1 digit(s), 1 non-alphanumeric symbol(s)
Password :
Re-enter Password :
What groups do you want this user to belong to? (Please enter a comma separated list, or leave blank for none)[ ]:
About to add user 'klinsmann' for realm 'ManagementRealm'
Is this correct yes/no? yes
....
Added user 'klinsmann' with groups to file '/opt/wildfly-26.0.1.Final/domain/configuration/mgmt-groups.properties'
Is this new user going to be used for one AS process to connect to another AS process?
e.g. for a slave host controller connecting to the master or for a Remoting connection for server to server Jakarta Enterprise Beans calls.
yes/no? yes
To represent the user add the following to the server-identities definition <secret value="UGFzc3cwcmQh" />
接下来,我们将为WildFly创建一个环境变量:
$ sudo vi /etc/wildfly/wildfly.conf
#要将控制台绑定到的地址
WILDFLY_CONSOLE_BIND=0.0.0.0
此外,编辑launch.sh脚本:
$ sudo vi /opt/wildfly/bin/launch.sh
#!/bin/bash
if [ "x$WILDFLY_HOME" = "x" ]; then
WILDFLY_HOME="/opt/wildfly"
fi
if [[ "$1" == "domain" ]]; then
$WILDFLY_HOME/bin/domain.sh -c $2 -b $3 -bmanagement $4
else
$WILDFLY_HOME/bin/standalone.sh -c $2 -b $3 -bmanagement $4
fi
同时编辑WildFly服务文件:
sudo vi /usr/lib/systemd/system/wildfly.service
按如下方式编辑文件:
[Unit]
Description=The WildFly Application Server
After=syslog.target network.target
Before=httpd.service
[Service]
Environment=LAUNCH_JBOSS_IN_BACKGROUND=1
EnvironmentFile=-/etc/wildfly/wildfly.conf
User=wildfly
LimitNOFILE=102642
PIDFile=/var/run/wildfly/wildfly.pid
ExecStart=/opt/wildfly/bin/launch.sh $WILDFLY_MODE $WILDFLY_CONFIG $WILDFLY_BIND $WILDFLY_CONSOLE_BIND
StandardOutput=null
[Install]
WantedBy=multi-user.target
重新加载系统守护程序并重新启动WildFly服务:
sudo systemctl daemon-reload
sudo systemctl restart wildfly.service
现在允许WildFly管理控制台端口通过防火墙:
sudo firewall-cmd --permanent --add-port=9990/tcp
sudo firewall-cmd --reload
禁用SELinux。
sudo setenforce 0
步骤5、访问WildFly管理控制台
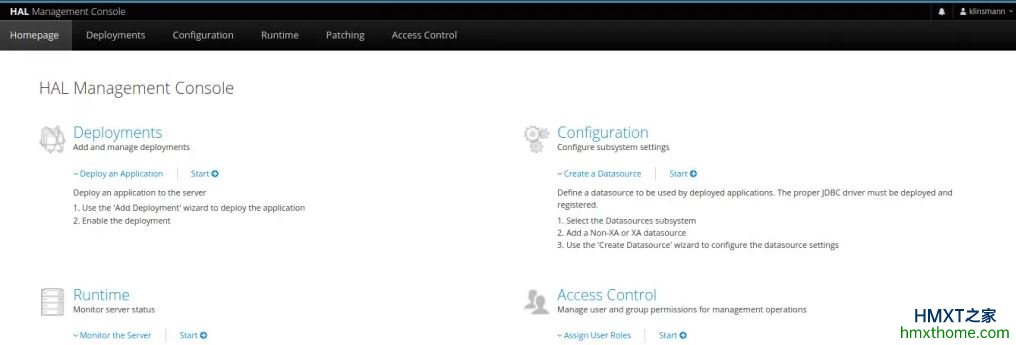
现在继续并使用URL访问WildFly管理控制台,地址格式为http://IP_address:9990/console,如下图:
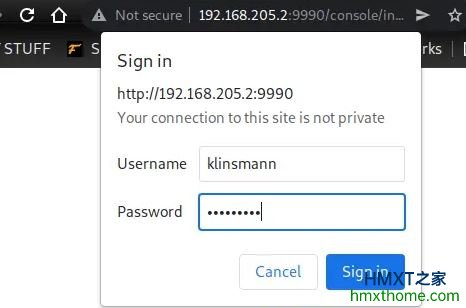
提供创建的管理员用户凭据:
现在,我们将在WildFly服务器上部署一个示例Java应用程序。首先,从GitHub下载Helloworld Java应用程序,地址在https://github.com/aeimer/java-example-helloworld-war,如下所示:
cd /opt/wildfly/standalone/deployments/
sudo curl -O https://raw.githubusercontent.com/aeimer/java-example-helloworld-war/master/dist/helloworld.war
查看可用文件:
$ ls
helloworld.war helloworld.war.deployed README.txt
从上面的输出中,名为*.deployed的文件显示应用程序已成功部署,否则该文件将命名为*.failed。您可以按如下方式查看WildFly日志:
$ tail /opt/wildfly/standalone/log/server.log | grep helloworld
INFO [org.jboss.as.server.deployment] (MSC service thread 1-2) WFLYSRV0027: Starting deployment of "helloworld.war" (runtime-name: "helloworld.war")
INFO [org.wildfly.extension.undertow] (ServerService Thread Pool -- 81) WFLYUT0021: Registered web context: '/helloworld' for server 'default-server'
INFO [org.jboss.as.server] (DeploymentScanner-threads - 2) WFLYSRV0010: Deployed "helloworld.war" (runtime-name : "helloworld.war")
可以使用URL在浏览器上查看部署,地址格式为http://IP_address:8080/helloworld/,如下图:

至此,在Rocky Linux 8/AlmaLinux 8操作系统上安装和配置WildFly完成。
相关资讯


