更新时间:2023-02-24 09:33:11浏览次数:433+次
本文介绍如何在Debian 11/Debian 10系统上安装配置Chef Infra服务器的方法。
前言
对于本指南,请确保您具备以下条件:
Sudo访问您的服务器。
系统上配置的主机名
3台Debian 11/Debian 10服务器。
对于本指南,这3台服务器的IP地址及主机名分别如下:
Chef Server-192.168.205.4 -chef-server.computingforgeeks.com
Chef Workstation-192.168.205.14 -workstation.computingforgeeks.com
Chef Client-192.168.205.24-chef-client.computingforgeeks.com
在服务器上配置主机名,如下所示:
##在Chef服务器上
sudo hostnamectl set-hostname chef-server.computingforgeeks.com --static
如果您没有有效的域名,请将其添加到已知主机列表中,如下所示,请在所有3台服务器上操作:
$ sudo vi /etc/hosts
192.168.205.4 chef-server.computingforgeeks.com chefserver
现在安装所需的依赖项:
sudo apt -y install git vim wget curl bash-completion
sudo apt update && sudo apt upgrade
sudo reboot
安装配置Chef Infra服务器的详细步骤
步骤1、配置NTP时间同步
Chef Infa服务器需要我们将Debian系统连接到网络时间协议(NTP)。
首先安装Chrony软件包:
sudo apt -y install chrony
设置本地时区:
sudo timedatectl set-timezone Asia/Shanghai
现在配置池列表。例如使用:
$ sudo vim /etc/chrony/chrony.conf
# pool 2.pool.ntp.org iburst //Comment out this line
server 0.ke.pool.ntp.org
server 1.africa.pool.ntp.org
server 3.africa.pool.ntp.org
# Allow NTP client access from local network.
allow 192.168.205.0/24
设置NTP同步:
sudo timedatectl set-ntp true
应用所做的更改:
sudo systemctl restart chrony
您需要允许NTP通过防火墙:
sudo ufw allow ntp
重新启动chronyd服务:
sudo systemctl restart chronyd
步骤2、在Debian 11/Debian 10上安装Chef Infra Server
从Chef Infra Server下载页面下载Chef InfraServer软件包,地址在https://www.chef.io/downloads/tools/infra-server。您也可以按如下方式下载软件包:
VERSION="14.12.21"
wget https://packages.chef.io/files/stable/chef-server/${VERSION}/ubuntu/20.04/chef-server-core_${VERSION}-1_amd64.deb
注:如果要下载15.5.1,则改成VERSION="15.5.1"即可。
安装下载的软件包:
sudo apt install ./chef-server-core_${VERSION}-1_amd64.deb
样本输出:
Selecting previously unselected package chef-server-core.
(Reading database ... 142930 files and directories currently installed.)
Preparing to unpack chef-server-core_14.11.36-1_amd64.deb ...
Unpacking chef-server-core (14.11.36-1) ...
Setting up chef-server-core (14.11.36-1) ...
Thank you for installing Chef Infra Server!
Run 'chef-server-ctl reconfigure' to configure your Chef Infra Server
安装完成后,重新配置Chef服务器:
sudo chef-server-ctl reconfigure
按返回的说明操作即可:
Licenses that need accepting:
* Chef Infra Server
* Chef Infra Client
* Chef InSpec
Do you accept the 3 product licenses (yes/no)?
> yes
Running handlers:
Running handlers complete
Chef Infra Client finished, 409/858 resources updated in 04 minutes 00 seconds
Chef Infra Server Reconfigured!
现在检查Chef Server组件的状态:
$ sudo chef-server-ctl status
run: bookshelf: (pid 19850) 32s; run: log: (pid 19358) 184s
run: elasticsearch: (pid 19817) 33s; run: log: (pid 19169) 220s
run: nginx: (pid 19803) 33s; run: log: (pid 19626) 41s
run: oc_bifrost: (pid 19707) 34s; run: log: (pid 19059) 237s
run: oc_id: (pid 19800) 33s; run: log: (pid 19097) 226s
run: opscode-erchef: (pid 19934) 32s; run: log: (pid 19502) 179s
run: postgresql: (pid 19696) 34s; run: log: (pid 18554) 253s
run: redis_lb: (pid 19649) 35s; run: log: (pid 20085) 31s
如果已启用UFW,则允许HTTP和HTTPS通过防火墙:
sudo ufw allow http
sudo ufw allow https
步骤3、创建管理员帐户和组织
管理员帐户确保服务器、工作站和节点之间的通信。使用的语法如下:
chef-server-ctl user create USERNAME FIRST_NAME [MIDDLE_NAME] LAST_NAME EMAIL PASSWORD
我们将首先导出变量:
USERNAME="chefadmin"
FIRST_NAME="Chef"
LAST_NAME="Administrator"
EMAIL="chefadmin@computingforgeeks.com"
PASSWORD="Passw0rd"
KEY_PATH="/root/chefadmin.pem"
现在运行下面的命令来创建一个管理员用户:
sudo chef-server-ctl user-create ${USERNAME} ${FIRST_NAME} ${LAST_NAME} ${EMAIL} ${PASSWORD} -f ${KEY_PATH}
验证用户创建:
$ sudo chef-server-ctl user-list
chefadmin
pivotal
继续并创建一个组织以添加上述用户。
通常,以下语法用于创建组织:
chef-server-ctl org-create ORG_NAME "ORG_FULL_NAME" --association_user USERNAME --filename ORGANIZATION-validator.pem (options)
以下是注解:
名称必须以小写字母或数字开头。
全名必须以非空格字符开头。
–association_user选项将用户与Chef服务器上的管理员安全组相关联。
–filename选项将RSA私钥保存到指定路径。
将自动生成RSA私钥。这是chef-validator密钥,应保存在安全位置。
对于这种情况,我的命令如下:
sudo chef-server-ctl org-create computingforgeeks 'computingforgeeks, Inc.' \
--association_user chefadmin \
--filename /root/computingforgeeks-validator.pem
查看组织列表:
$ sudo chef-server-ctl org-list
computingforgeeks
您还可以验证用户和组织的RSA密钥是否可用:
$ sudo find /root -name "*.pem"
/root/chefadmin.pem
/root/computingforgeeks-validator.pem
步骤4、安装和配置Chef Workstation
Chef Workstation用于开发配置,然后将其推送到Chef服务器。
首先从Chef Workstation下载页面下载软件包即可安装,下载地址在https://www.chef.io/downloads/tools/workstation。
或者,使用以下Wget下载:
#On Debian 11
VERSION="22.1.745"
wget https://packages.chef.io/files/stable/chef-workstation/${VERSION}/debian/11/chef-workstation_${VERSION}-1_amd64.deb
#On Debian 10
VERSION="22.1.745"
wget https://packages.chef.io/files/stable/chef-workstation/${VERSION}/debian/10/chef-workstation_${VERSION}-1_amd64.deb
使用以下命令安装软件包:
sudo dpkg -i chef-workstation_${VERSION}-1_amd64.deb
样本输出:
Selecting previously unselected package chef-workstation.
(Reading database ... 141880 files and directories currently installed.)
Preparing to unpack chef-workstation_22.1.745-1_amd64.deb ...
Unpacking chef-workstation (22.1.745-1) ...
Setting up chef-workstation (22.1.745-1) ...
The Chef Workstation App is available.
Launch the App by running 'chef-workstation-app'.
The App will then be available in the system tray.
Thank you for installing Chef Workstation!
验证安装:
$ chef --version
Chef Workstation version: 22.1.745
Chef InSpec version: 4.52.9
Chef CLI version: 5.5.0
Chef Habitat version: 1.6.420
Test Kitchen version: 3.2.2
Cookstyle version: 7.26.1
Chef Infra Client version: 17.9.26
knife也已安装:
$ knife --version
Chef Infra Client: 17.9.26
现在生成Chef repo,如下所示:
$ chef generate repo chef-repo
Licenses that need accepting:
* Chef Workstation
* Chef Infra Client
* Chef InSpec
Do you accept the 3 product licenses (yes/no)?
> yes
Persisting 3 product licenses...
3 product licenses persisted.
Generating Chef Infra repo chef-repo
Loading Chef InSpec profile files:
Loading Chef InSpec input files:
Loading Chef InSpec waiver files:
- Ensuring correct Chef Infra repo file content
Your new Chef Infra repo is ready! Type `cd chef-repo` to enter it.
继续并创建一个目录以存储Knife配置:
mkdir ~/chef-repo/.chef
cd chef-repo
创建一对RSA密钥:
$ ssh-keygen -b 4096
Generating public/private rsa key pair.
Enter file in which to save the key (/home/thor/.ssh/id_rsa):
Enter passphrase (empty for no passphrase):
Enter same passphrase again:
Your identification has been saved in /home/thor/.ssh/id_rsa
Your public key has been saved in /home/thor/.ssh/id_rsa.pub
将钥匙发送到Chef server。确保允许root登录:
$ ssh-copy-id root@192.168.205.4
/usr/bin/ssh-copy-id: INFO: Source of key(s) to be installed: "/home/thor/.ssh/id_rsa.pub"
/usr/bin/ssh-copy-id: INFO: attempting to log in with the new key(s), to filter out any that are already installed
/usr/bin/ssh-copy-id: INFO: 1 key(s) remain to be installed -- if you are prompted now it is to install the new keys
root@192.168.205.4's password:
Number of key(s) added: 1
Now try logging into the machine, with: "ssh 'root@192.168.205.4'"
and check to make sure that only the key(s) you wanted were added.
从Chef Server复制.pem文件:
scp root@192.168.205.4:/root/*.pem ~/chef-repo/.chef/
查看复制的关键点:
$ ls ~/chef-repo/.chef
chefadmin.pem computingforgeeks-validator.pem
生成了Chef Cookbook:
$ chef generate cookbook chef-first-cookbook
Hyphens are discouraged in cookbook names as they may cause problems with custom resources. See https://docs.chef.io/workstation/ctl_chef/#chef-generate-cookbook for more information.
Generating cookbook chef-first-cookbook
Loading Chef InSpec profile files:
Loading Chef InSpec input files:
Loading Chef InSpec waiver files:
- Ensuring correct cookbook content
Why not start by writing an InSpec test? Tests for the default recipe are stored at:
test/integration/default/default_test.rb
If you'd prefer to dive right in, the default recipe can be found at:
recipes/default.rb
步骤5、配置Knife并引导客户端节点
引导客户机节点需要在客户机系统上安装Chef Infra client,以便在其与Chef服务器之间进行通信。
有两种方法可以用来引导客户端节点:
无人参与安装–从节点引导,无需SSH或WinRM连接。
Knife引导–从Chef workstation。
本指南演示如何使用Knife引导方法引导客户端节点。
现在,在工作站节点上,创建一个config.rb文件,如下所示:
vim ~/chef-repo/.chef/config.rb
适当替换以下内容:
current_dir = File.dirname(__FILE__)
log_level :info
log_location STDOUT
node_name 'chefadmin'
client_key "chefadmin.pem"
validation_client_name 'computingforgeeks-validator'
validation_key "computingforgeeks-validator.pem"
chef_server_url 'https://chef-server.computingforgeeks.com/organizations/computingforgeeks'
cache_type 'BasicFile'
cache_options( :path => "#{ENV['HOME']}/.chef/checksums" )
cookbook_path ["#{current_dir}/../cookbooks"]
记得适当更换Chef server和组织详细信息。保存文件,然后继续复制SSL证书:
$ cd ~/chef-repo
$ knife ssl fetch
WARNING: Certificates from chef-server.computingforgeeks.com will be fetched and placed in your trusted_cert
directory (/home/thor/chef-repo/.chef/trusted_certs).
Knife has no means to verify these are the correct certificates. You should
verify the authenticity of these certificates after downloading.
Adding certificate for chef-server_computingforgeeks_com in /home/thor/chef-repo/.chef/trusted_certs/chef-server_computingforgeeks_com.crt
验证config.rb是否已设置:
$ knife client list
computingforgeeks-validator
现在引导您的Chef Client节点,在本例中,IP地址为192.168.205.24,因此如下所示:
cd ~/chef-repo/.chef
knife bootstrap 192.168.205.24 -x root -P ***** --node-name chef-client-node1
请记住,根用户用于所需的提升权限。确保Chef客户端节点上允许root登录。
如下所示:
$ knife bootstrap 192.168.205.24 -x root -P ***** --node-name chef-client-node1
-x/--winrm-user: This flag is deprecated. Use -U/--connection-user instead.
Connecting to 192.168.205.24 using ssh
The authenticity of host '192.168.205.24 ()' can't be established.
fingerprint is SHA256:5iGXeB0Fr2zfznkmmGv8ZDIL5SdHk6nXGKt7vSf1Ufg.
Are you sure you want to continue connecting
? (Y/N) y
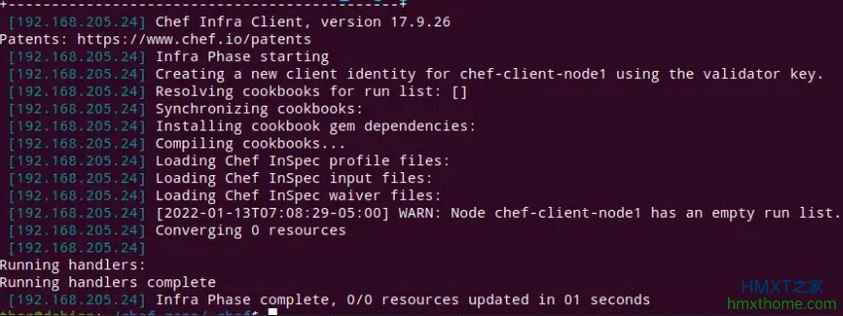
引导过程如下所示:
完成后,验证节点是否已添加:
$ knife node list
chef-client-node1
您还可以查看有关节点的更多信息,如下所示:
knife node show chef-client-node1
样本输出:

步骤6、安装Chef Manage
Chef manage提供了一个Web界面,您可以在其中管理Chef服务器任务。其安装方式如下。
在Chef server上,从Chef管理下载页面下载Chef管理包,地址在https://www.chef.io/downloads/tools/manage,或用以下方式下载:
VER="3.2.43"
wget https://packages.chef.io/files/stable/chef-manage/${VER}/ubuntu/20.04/chef-manage_${VER}-1_amd64.deb
按如下方式安装软件包:
$ sudo dpkg -i chef-manage_${VER}-1_amd64.deb
Selecting previously unselected package chef-manage.
(Reading database ... 199475 files and directories currently installed.)
Preparing to unpack chef-manage_3.2.35-1_amd64.deb ...
Unpacking chef-manage (3.2.35-1) ...
Setting up chef-manage (3.2.35-1) ...
Thank you for installing the Chef Management Console add-on!
The next step in the process is to run:
chef-manage-ctl reconfigure
重新配置Chef服务器和插件,如下所示:
sudo chef-server-ctl reconfigure
sudo chef-manage-ctl reconfigure
完成后,使用URL访问Web UI,地址格式为https://serverip/login,在登录页面上,为步骤3中创建的Admin用户提供凭据:

您应该能够看到添加了客户端节点的Chef仪表板,如下所示:

到这里,说明在Debian 11/Debian 10系统上安装配置Chef Infra服务器全部完成。
相关资讯


