更新时间:2023-02-27 10:17:34浏览次数:259+次
本文介绍在Linux系统下安装和使用WordPress安全扫描程序WPScan的方法,当前可使用Ruby gem、Docker或APT(Kali Linux)安装。
安装WPScan的方法
方法1、使用Ruby gem安装WPScan
对于此方法,需要几个依赖项,包括Ruby >= 2.5、Curl >= 7.72、RubyGems、Nokogiri。
可以在先安装依赖项。
安装cURL:
##在Debian/Ubuntu上
sudo apt update
sudo apt -y install curl
##在RHEL/CentOS/Rocky Linux/Alma Linux上
sudo yum -y install curl
检查已安装的cURL版本:
$ curl -V
curl 7.74.0 (x86_64-pc-linux-gnu) libcurl/7.74.0 OpenSSL/1.1.1k zlib/1.2.11 brotli/1.0.9 libidn2/2.3.0 libpsl/0.21.0 (+libidn2/2.3.0) libssh2/1.9.0 nghttp2/1.43.0 librtmp/2.3
然后导入GPG签名:
curl -sSL https://rvm.io/mpapis.asc | gpg --import -
curl -sSL https://rvm.io/pkuczynski.asc | gpg --import -
在Linux上安装RVM:
$ curl -L get.rvm.io | bash -s stable
Installing RVM to /home/thor/.rvm/
Adding rvm PATH line to /home/thor/.profile /home/thor/.mkshrc /home/thor/.bashrc /home/thor/.zshrc.
Adding rvm loading line to /home/thor/.profile /home/thor/.bash_profile /home/thor/.zlogin.
Installation of RVM in /home/thor/.rvm/ is almost complete:
* To start using RVM you need to run `source /home/thor/.rvm/scripts/rvm`
in all your open shell windows, in rare cases you need to reopen all shell windows.
记住源RVM路径:
source /home/$USER/.rvm/scripts/rvm
使用RVM安装Ruby 2.5:
export RUBY_VER='2.5'
rvm install ${RUBY_VER}
rvm use ${RUBY_VER} --default
检查已安装的Ruby版本:
$ ruby -v
ruby 2.5.8p224 [x86_64-linux]
安装Nokogiri:
$ gem install nokogiri -v 1.12.5
Fetching nokogiri-1.12.5-x86_64-linux.gem
Successfully installed nokogiri-1.12.5-x86_64-linux
Parsing documentation for nokogiri-1.12.5-x86_64-linux
Installing ri documentation for nokogiri-1.12.5-x86_64-linux
Done installing documentation for nokogiri after 1 seconds
1 gem installed
现在使用RubyGems安装WordPress安全扫描程序WPScan:
$ gem install wpscan
Fetching ffi-1.15.5.gem
Fetching ethon-0.14.0.gem
Fetching addressable-2.8.0.gem
Fetching get_process_mem-0.2.7.gem
Fetching concurrent-ruby-1.1.9.gem
Fetching tzinfo-2.0.4.gem
Fetching i18n-1.8.11.gem
Fetching activesupport-6.1.4.4.gem
Fetching cms_scanner-0.13.6.gem
Installing ri documentation for wpscan-3.8.20
Done installing documentation for ffi, ethon, get_process_mem, concurrent-ruby, i18n, tzinfo, zeitwerk, activesupport, public_suffix, addressable, opt_parse_validator, ruby-progressbar, typhoeus, yajl-ruby, sys-proctable, cms_scanner, wpscan after 17 seconds
17 gems installed
可以使用命令更新WPScan:
$ gem update wpscan
Updating installed gems
Nothing to update
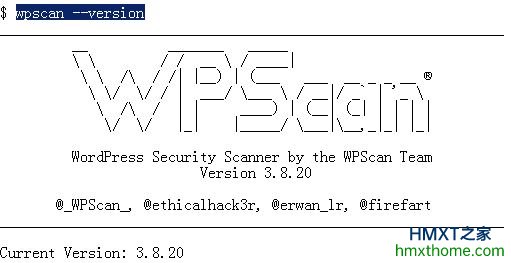
确认成功安装:
$ wpscan --version
方法2、使用Docker安装WPScan
对于这种方法,您需要在系统上安装Docker。这可以通过以下专用指南实现:
如何在Ubuntu 22.04系统上安装Docker CE:https://www.hmxthome.com/linux/4941.html
安装并运行Docker后,将用户添加到Docker组:
sudo usermod -aG docker $USER
newgrp docker
Pull WPScan容器图像:
$ docker pull wpscanteam/wpscan
Using default tag: latest
latest: Pulling from wpscanteam/wpscan
Status: Downloaded newer image for wpscanteam/wpscan:latest
docker.io/wpscanteam/wpscan:latest
现在,您可以按如下方式运行WPScan:
docker run -it --rm wpscanteam/wpscan [option]
方法3、使用APT安装WPScan
WPScan在默认的Kali Linux APT存储库中可用,可以使用简单的APT命令安装。
更新APT包索引:
sudo apt update
现在安装WPScan:
sudo apt install wpscan
依赖关系树:
Reading package lists... Done
Building dependency tree... Done
Reading state information... Done
The following packages were automatically installed and are no longer required:
libdap27 libdapclient6v5 libdav1d4 libepsilon1 libgdal28 libgeos-3.9.1
libgupnp-1.2-0 libidn11 libnetcdf18 libntfs-3g883 libomp-11-dev libomp5-11
libproj19 liburcu6 libx265-192 libyara4 python3-editor
python3-ipython-genutils python3-pylnk
Use 'sudo apt autoremove' to remove them.
The following packages will be upgraded: wpscan
1 upgraded, 0 newly installed, 0 to remove and 818 not upgraded.
使用WPScan
使用上述任何方法安装后,WPScan可用于扫描漏洞。请注意,以下扫描应该针对您自己的博客执行。
1、扫描整个博客站点
要扫描整个博客,请运行以下命令:
wpscan --url wordpress.example.com
对于Docker:
docker run -it --rm wpscanteam/wpscan --url wordpress.example.com
样本输出:
默认情况下,WPScan将扫描HTTP,如果您希望扫描HTTPS,请按以下方式修改您的URL:
wpscan --url https://wordpress.example.com -o scan-test
-o标志可用于在文件中输出扫描结果。
有3种检测模式可以在WordPress网站上运行,即:
aggressive mode–通过向服务器发送一千个请求来进行更深入的扫描。
passive mode–向服务器发送一些请求,这通常用于扫描主页。
mixed(默认)–同时使用主动和被动模式。
可以如下指定给定的检测模式:
wpscan --url wordpress.example.com -o test --detection-mode aggressive
2、扫描易受攻击的插件
要检查插件中的漏洞,请使用以下参数:
-e/--enumerate [OPTS]选项添加到wpscan。这里的[OPTS]可以是所有插件的ap、易受攻击插件的vp和插件的p。
例如,要扫描易受攻击的插件,请使用以下命令:
wpscan --url wordpress.example.com -e vp
3、扫描易受攻击的主题
与插件类似,可以使用-e/--enumerate [OPTS]命令扫描主题。但现在,[OPTS]被替换为vt(易受攻击的主题)、at(所有主题)或t(主题)。
例如,具有已知漏洞的主题可以扫描如下:
wpscan --url wordpress.example.com -e vt
4、密码强度测试
为了解密码的优势,您可以尝试使用特殊手段。根据要扫描的密码文件中的密码数量,此过程可能有点慢-P, --passwords FILE-PATH, -t, --max-threads VALUE指定线程数。
例如,要强制管理用户,请运行以下命令:
wpscan --url wordpress.example.com -P password-file.txt -U admin -t 50
可以在不指定用户名的情况下测试许多用户的密码强度:
wpscan --url wordpress.example.com -P password-file.txt -t 50
5、枚举WordPress用户
要了解可以登录到站点的用户,请使用-e/--enumerate u选项。这里,u代表用户ID:
wpscan --url wordpress.example.com -e u
6、在无法检测的模式下扫描WordPress
上述扫描也可以在隐身模式下进行,只需添加一个参数--stealthy。
例如:
wpscan --url wordpress.example.com --stealthy
如果您在使用WPScan时需要帮助,请按以下方式查找帮助:
$ wpscan -h
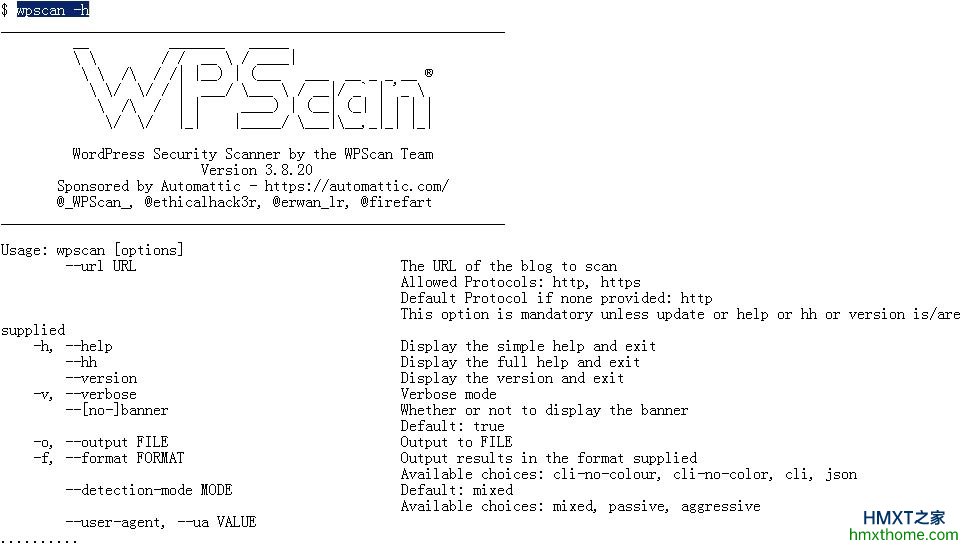
注:具体的帮助信息会在返回的信息中罗列出来,比如用法命令为wpscan [options],使用者应根据可使用的参数来实机操作一下。
相关资讯


