更新时间:2023-04-10 10:40:39浏览次数:97+次
本文介绍如何在Rocky Linux 8/CentOS 8系统上安装和配置NetBox IPAM。
简介
Netbox是一个免费的开源工具,用于通过网络管理和记录计算机网络,这有助于通过创建数据中心中每个设备的虚拟实现来减少组织中联网的繁琐任务。以前,这项任务是通过在纸上绘制网络结构来完成的,但使用NetBox,可以通过网络可视化有组织和可呈现的操作。
Netbox是用Django编写的,使用PostgreSQL数据库来记录计算机网络和管理IP地址。
在Rocky Linux 8/CentOS 8上安装和配置NetBox IPAM的详细步骤
1、更新系统和安装依赖项
在本指南中,我们将在Rocky Linux 8/CentOS 8系统上安装和配置NetBox IPAM工具。对于本指南,您需要:
Rocky Linux 8或CentOS 8系统。
具有sudo权限的用户。
Python 3.8及以上版本。
PostgreSQL 10版。
Redis 4.0版。
更新您的系统:
sudo yum update -y
安装安装依赖项所需的EPEL存储库:
sudo dnf -y install https://dl.fedoraproject.org/pub/epel/epel-release-latest-8.noarch.rpm
安装所需的依赖项:
sudo yum install -y gcc libxml2-devel libxslt-devel libffi-devel libpq-devel openssl-devel redhat-rpm-config git vim
将SELinux设置为允许模式,因为我们将使用TCP端口:
sudo sed -i 's/^SELINUX=.*/SELINUX=disabled/g' /etc/selinux/config
cat /etc/selinux/config | grep SELINUX=
2、安装Python
在本指南中,我们将安装Python 3.9,因为此版本的Netbox IPAM需要Python 3.7及更高版本,可参考Rocky Linux 8/AlmaLinux 8上安装Python 3.9及2.7版本一文,阅读地址在https://www.hmxthome.com/linux/4992.html。当前Python 3.9在默认存储库中可用,可以使用以下命令进行安装:
在Rocky Linux 8上安装Python 3.9 |可在CentOS 8上使用以下命令安装:
sudo yum install python3.9
会返回如python39 x86_64 3.9.7-1.module_el8.6.0+930+10acc06f的软件包。
确定python的路径:
$ whereis python3.9
python3: /usr/bin/python3.6 /usr/bin/python3.6m /usr/bin/python3 /usr/bin/python3.9 /usr/lib/python3.6 /usr/lib/python3.9 /usr/lib64/python3.6 /usr/lib64/python3.9 /usr/include/python3.6m /usr/include/python3.9 /usr/share/man/man1/python3.1.gz
创建一个指向/usr/bin/python的符号链接。如果已经存在链接,请删除现有的文件sudo rm -rf /usr/bin/python3和pip3:
sudo ln -fs /usr/bin/python3.9 /usr/bin/python3
sudo ln -fs /usr/bin/pip3.9 /usr/bin/pip3
验证已安装的版本:
$ python3 --version
Python 3.9.13
3、安装和配置PostgreSQL数据库
由于Netbox IPAM使用PostgreSQL数据库,因此我们需要安装它。首先,检查可用的版本:
$ sudo dnf module list postgresql
它会返回一些PostgreSQL版本信息。比如要安装postgresql 13版本,可按如下方式启用:
$ sudo dnf module enable postgresql:13
继续并安装已启用的PostgreSQL版本:
sudo dnf install postgresql-server
初始化PostgreSQL:
sudo postgresql-setup --initdb
成功安装后,启动PostgreSQL并使其能够在启动时运行:
sudo systemctl start postgresql
sudo systemctl enable postgresql
现在为NetBox IPAM创建一个数据库:
sudo -u postgres psql
在PostgreSQL shell中,创建一个数据库,如下所示:
CREATE DATABASE netbox;
CREATE USER netbox WITH PASSWORD 'Passw0rd';
GRANT ALL PRIVILEGES ON DATABASE netbox TO netbox;
\q
在PostgreSQL中启用密码登录:
sudo sed -i -e 's/ident/md5/' /var/lib/pgsql/data/pg_hba.conf
sudo systemctl restart postgresql
确认您是否可以登录到使用密码集创建的数据库:
$ psql -U netbox -h localhost -W
Password: <Input-Password>
psql (13.3)
Type "help" for help.
netbox=> \q
4、在Rocky Linux 8/CentOS 8上安装和配置Redis
所需的Redis版本为4.0及以上,请按如下方式安装:
sudo yum install -y redis
启动并启用Redis:
sudo systemctl start redis
sudo systemctl enable redis
检查已安装的版本:
$ redis-server -v
Redis server v=5.0.3 sha=00000000:0 malloc=jemalloc-5.1.0 bits=64 build=9529b692c0384fb7
验证服务器状态:
$ redis-cli ping
PONG
5、在Rocky Linux 8/CentOS 8上安装和配置Netbox
现在,我们来到了本指南的核心内容部分,我们需要从git克隆NetBox IPAM,并在Rocky Linux 8/CentOS 8上进行配置。
首先,导航到/opt/目录并克隆NetBox:
sudo mkdir -p /opt/netbox/ && cd /opt/netbox/
sudo git clone -b master --depth 1 https://github.com/netbox-community/netbox.git .
创建Netbox用户:
sudo groupadd --system netbox
sudo adduser --system -g netbox netbox
sudo chown --recursive netbox /opt/netbox/netbox/media/
现在为Netbox创建一个配置文件:
cd /opt/netbox/netbox/netbox/
sudo cp configuration_example.py configuration.py
现在编辑配置文件:
sudo vim configuration.py
按如下方式编辑文件:
# Example: ALLOWED_HOSTS = ['netbox.example.com', 'netbox.internal.local']
ALLOWED_HOSTS = ['*']
# PostgreSQL database configuration.
DATABASE = {
'NAME': 'netbox', # 您创建的数据库名称
'USER': 'netbox', # 您创建的用户名
'PASSWORD': 'Passw0rd', # 您设置的密码
'HOST': 'localhost', # 数据库服务器
'PORT': '', # 数据库端口(默认为空)
'CONN_MAX_AGE': 300, # 最大数据库连接期限
}
由于Netbox需要两个数据库来执行任务和缓存,我们将继续编辑Redis数据库。默认值是可以的:
REDIS = {
'tasks': {
'HOST': 'localhost', # Redis服务器
'PORT': 6379, # Redis端口
'PASSWORD': '', # Redis密码(可选)
'DATABASE': 0, # 数据库ID
'SSL': False, # 使用SSL(可选)
},
'caching': {
'HOST': 'localhost',
'PORT': 6379,
'PASSWORD': '',
'DATABASE': 1, # 第二个数据库的唯一ID
'SSL': False,
}
}
1]、生成Django密钥
现在生成Django SECRET密钥,如下所示:
python3 ../generate_secret_key.py
会返回Django SECRET Key信息,比如Tzvw(9w1tc2^lRzwLc@cDgdrX^3AwDDWXBgMM7OU$vR7LLAh#V。
生成密钥后,继续并在configuration.py中进行设置,如下所示:
$ sudo vim /opt/netbox/netbox/netbox/configuration.py
# https://docs.djangoproject.com/en/stable/ref/settings/#std:setting-SECRET_KEY
SECRET_KEY = 'Tzvw(9w1tc2^lRzwLc@cDgdrX^3AwDDWXBgMM7OU$vR7LLAh#V'
2]、运行升级脚本
升级脚本会自动运行以下操作:
创建Python环境并安装所有必需的Python包。
运行数据库架构迁移。
本地生成文档(供脱机使用)。
聚合磁盘上的静态资源文件。
使用的命令如下:
sudo /opt/netbox/upgrade.sh
样本输出:
Running migrations:
Applying contenttypes.0001_initial... OK
Applying auth.0001_initial... OK
Applying admin.0001_initial... OK
Applying admin.0002_logentry_remove_auto_add... OK
Applying admin.0003_logentry_add_action_flag_choices... OK
Applying contenttypes.0002_remove_content_type_name... OK
Applying auth.0002_alter_permission_name_max_length... OK
Applying auth.0003_alter_user_email_max_length... OK
Applying auth.0004_alter_user_username_opts... OK
Applying auth.0005_alter_user_last_login_null... OK
Applying auth.0006_require_contenttypes_0002... OK
Applying auth.0007_alter_validators_add_error_messages... OK
Applying auth.0008_alter_user_username_max_length... OK
Applying auth.0009_alter_user_last_name_max_length... OK
Applying auth.0010_alter_group_name_max_length... OK
Applying auth.0011_update_proxy_permissions... OK
Applying auth.0012_alter_user_first_name_max_length... OK
Applying extras.0001_squashed... OK
Applying tenancy.0001_squashed_0012... OK
Applying tenancy.0002_tenant_ordering... OK
Applying dcim.0001_squashed... OK
Applying dcim.0002_squashed... OK
Applying ipam.0001_squashed... OK
Applying virtualization.0001_squashed_0022... OK
Applying extras.0002_squashed_0059... OK
Applying extras.0060_customlink_button_class... OK
Collecting static files (python3 netbox/manage.py collectstatic --no-input)...
478 static files copied to '/opt/netbox/netbox/static'.
Removing stale content types (python3 netbox/manage.py remove_stale_contenttypes --no-input)...
Removing expired user sessions (python3 netbox/manage.py clearsessions)...
Upgrade complete! Don't forget to restart the NetBox services:
> sudo systemctl restart netbox netbox-rq
3]、创建Netbox用户帐户
下一步需要我们创建一个超级用户帐户,因为Netbox没有预定义的用户帐户。从Netbox目录执行命令:
source /opt/netbox/venv/bin/activate
cd /opt/netbox/netbox
python3 manage.py createsuperuser
按以下步骤进行:
用户名(留空以使用“thor”):admin
电子邮件地址:admin@computingforgeeks.com
然后输入密码。
然后会提示超级用户创建成功。
继续并安排内务管理任务。这样可以处理重复的清理任务:
sudo ln -s /opt/netbox/contrib/netbox-housekeeping.sh /etc/cron.daily/netbox-housekeeping
4]、测试
现在测试应用程序。但在此之前,请允许端口8000通过防火墙:
sudo firewall-cmd --add-port=8000/tcp --permanent
sudo firewall-cmd --reload
现在测试Netbox:
$ python3 manage.py runserver 0.0.0.0:8000 --insecure
Performing system checks...
System check identified no issues (0 silenced).
Django version 4.0.4, using settings 'netbox.settings'
Starting development server at http://0.0.0.0:8000/
Quit the server with CONTROL-C.
至此,您可以使用URL访问,地址格式是http://IP_Address:8000,也可以尝试使用创建的超级用户登录。
使用CTL+C停止服务器,然后按如下操作。
5]、安装和配置Gunicorn模块
Netbox提供默认的Gunicorn配置,可以复制到Netbox路径,如下所示:
sudo cp /opt/netbox/contrib/gunicorn.py /opt/netbox/gunicorn.py
您可能希望编辑文件并为绑定Ip和端口进行配置:
sudo vim /opt/netbox/gunicorn.py
在文件中,添加以下行:
bind = '127.0.0.1:8001'
workers = 5
threads = 3
timeout = 120
# The maximum number of requests a worker can handle before being respawned
max_requests = 5000
max_requests_jitter = 500
6]、创建一个systemd服务文件
为了能够像其他系统服务一样管理Netbox,我们需要创建系统文件:
sudo cp -v /opt/netbox/contrib/*.service /etc/systemd/system/
sudo systemctl daemon-reload
启动并启用Netbox服务:
sudo systemctl start netbox netbox-rq
sudo systemctl enable netbox netbox-rq
验证服务是否正在运行:
$ systemctl status netbox.service
netbox.service - NetBox WSGI Service
Loaded: loaded (/etc/systemd/system/netbox.service; enabled; vendor preset: disabled)
Active: active (running)
该服务应该在8001端口上运行:
$ ss -tunelp | grep 8001
tcp LISTEN 0 128 127.0.0.1:8001 0.0.0.0:* uid:993 ino:24304646 sk:1e <->
6、为Netbox IPAM安装和配置Nginx
在本指南中,我们将展示Nginx网络服务器的配置。使用以下命令在Rocky Linux 8/CentOS 8上安装Nginx web服务器:
sudo yum -y install nginx
我们将首先为我们的网页创建一个虚拟主机文件:
sudo vim /etc/nginx/conf.d/netbox.conf
在文件中,添加以下行。将netbox.example.com替换为您的FQDN或IP_address:
server {
listen 80;
server_name netbox.example.com;
client_max_body_size 25m;
location /static/ {
alias /opt/netbox/netbox/static/;
}
location / {
proxy_pass http://127.0.0.1:8001;
proxy_set_header X-Forwarded-Host $http_host;
proxy_set_header X-Real-IP $remote_addr;
proxy_set_header X-Forwarded-Proto $scheme;
}
}
检查创建的文件的语法:
$ sudo nginx -t
nginx: the configuration file /etc/nginx/nginx.conf syntax is ok
nginx: configuration file /etc/nginx/nginx.conf test is successful
启动并启用Nginx以在启动时运行:
sudo systemctl restart nginx
sudo systemctl enable nginx
允许SELinux上的端口8001:
sudo semanage port -a -t dns_port_t -p tcp 8001
sudo setsebool -P httpd_can_network_connect 1
如果您正在使用firewalld,请允许端口通过防火墙:
sudo firewall-cmd --permanent --add-port={80,443}/tcp
sudo firewall-cmd --reload
7、访问Netbox IPAM工具Web UI
经过相应的配置,我们现在可以使用URL访问Netbox IPAM web界面,地址格式为 http://Hostname或者http://IP_Address,您将被授予此页面:

要进行更改,您需要登录。单击右角的“Log in”。输入在上面的步骤2中为超级用户帐户创建的凭据:

成功登录后,您将被授予此窗口:

在这里,您可以导航到左侧的面板,如下所示:
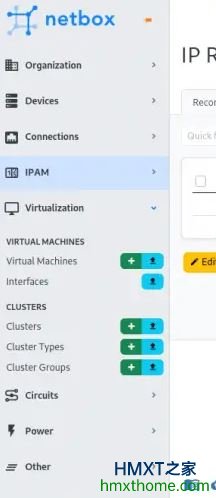
从面板中,可以添加设备、连接、IPAM、集群、电路、电源和其他选项。这意味着,使用Netbox可以通过在此处添加所需的设备来完全管理数据中心。例如,要添加设备,您需要输入以下信息:

至此,在Rocky Linux 8/CentOS 8上安装和配置NetBox IPAM工具全部完成。
相关资讯


