更新时间:2023-05-08 09:29:33浏览次数:488+次
本指南演示了如何在Ubuntu 22.04 Linux系统上使用SEO插件部署Strapi应用程序,将安装和配置Strapi应用程序。用户需要具备有Ubuntu 22.04服务器,至少4GB RAM和2个CPU内核、Node.js版本16及以上、安装好PostgreSQL及Nginx网络服务器,也可再选择部署FQDN(域名指向服务器的公共IP)。
在Ubuntu 22.04上部署带有SEO插件的Strapi应用程序的详细方法
1、安装和配置PostgreSQL的说明
Strapi支持多个数据库服务器,包括MySQL、MariaDB、SQLite和PostgreSQL。在本指南中,我们将使用PostgreSQL数据库。要在Ubuntu 22上安装PostgreSQL,请按照下面指南中的帮助进行操作:
在Ubuntu 22.04系统上安装PostgreSQL 14的详细步骤:https://www.hmxthome.com/linux/4836.html
安装后,为Strapi创建一个数据库:
sudo -i -u postgres psql
CREATE DATABASE strapi_db;
创建Strapi数据库用户:
CREATE USER strapiuser WITH PASSWORD 'Your_Password';
将创建的数据库的所有权授予上述用户:
ALTER DATABASE strapi_db OWNER TO strapiuser;
现在退出shell:
postgres-# \q
验证是否可以使用创建的用户访问数据库:
$ psql --username strapiuser --password --host localhost strapi_db
Password:
psql (14.7 (Ubuntu 14.7-1.pgdg22.04+1))
SSL connection (protocol: TLSv1.3, cipher: TLS_AES_256_GCM_SHA384, bits: 256, compression: off)
Type "help" for help.
strapi_db=>
2、安装Node.js的说明
Strapi应用程序是一个Node.js应用程序。出于这个原因,您需要在系统上安装NodeJS才能运行。要安装Node.js,请使用以下指南中的帮助:
在Ubuntu 22.04系统上安装Node.js和npm的三种方法:https://www.hmxthome.com/linux/4833.html
验证安装,比如安装了v16.19.1版本:
$ node -v
v16.19.1
3、在Ubuntu 22.04上安装Strapi应用程序
一旦安装了PostgreSQL和Node.js,我们就可以继续安装Strapi了。我们将从创建Strapi项目开始:
npx create-strapi-app@latest strapi-project
按y继续创建。在交互式shell中,选择自定义安装,然后选择数据库客户端、数据库名称和用户名:
Ok to proceed? (y) y
Choose your installation type Custom (manual settings)
Choose your preferred language JavaScript
Choose your default database client postgres
Database name: strapi_db
Host: 127.0.0.1
Port: 5432
Username: strapiuser
Password: *************
Enable SSL connection: No
一旦完成,您将创建项目“strapi-project”。导航到它:
cd strapi-project
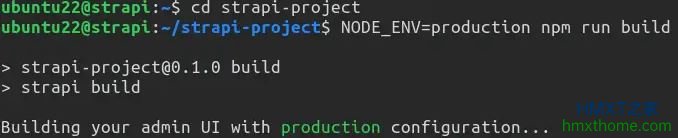
现在运行以下命令来构建项目:
NODE_ENV=production npm run build
样本输出:
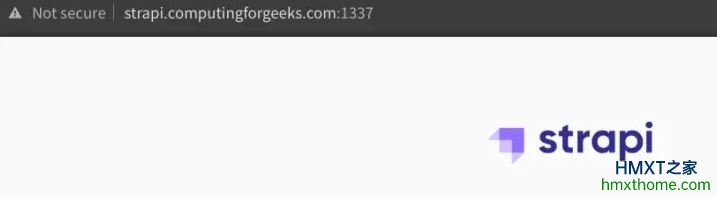
这个命令应该构建Strapi项目,包括Strapi管理UI。要测试是否一切正常,请使用以下命令启动Strapi服务器:
node ~/strapi-project/node_modules/.bin/strapi start
样本输出:

从上面的输出中,我们可以看到Strapi管理UI在端口1337上侦听:
注:要退出服务器,请按CTRL+C。
4、安装和配置PM2
PM2(Process Manager 2)是Node.js应用程序中流行且广泛使用的流程管理器。它允许开发人员管理和监控他们的Node.js应用程序,确保高可用性、可扩展性和性能。
我们在这里使用它是为了避免手动启动应用程序,从而确保正常运行时间。要安装PM2,请使用以下命令:
cd ~
sudo npm install pm2@latest -g
安装后,创建一个配置文件:
sudo vim ecosystem.config.js
在打开的文件中,添加行:
module.exports = {
apps: [
{
name: 'strapi',
cwd: '/home/ubuntu22/strapi-project',
script: 'npm',
args: 'start',
env: {
NODE_ENV: 'production',
DATABASE_HOST: 'localhost',
DATABASE_PORT: '5432',
DATABASE_NAME: 'strapi_db',
DATABASE_USERNAME: 'strapiuser',
DATABASE_PASSWORD: 'Your_Password',
},
},
],
};
确保已正确替换所有变量。请记住/home/ubuntu22/strapi-project是我的项目的路径,在继续之前,您需要将其替换为自己的路径。
修改后,保存文件,然后使用以下命令在后台启动应用程序:
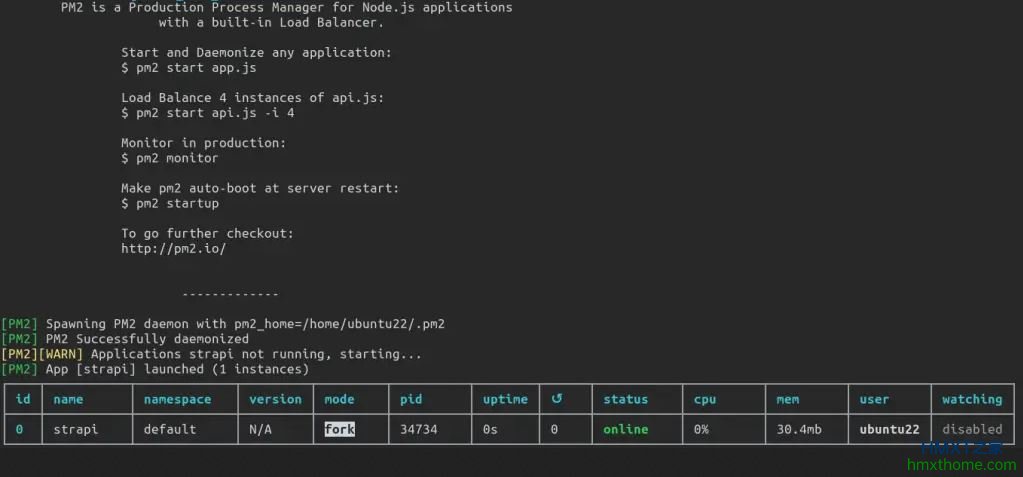
pm2 start ecosystem.config.js
样本输出:
要允许应用程序在启动时自动启动,请使用以下命令:
$ pm2 startup
[PM2] Init System found: systemd
[PM2] To setup the Startup Script, copy/paste the following command:
sudo env PATH=$PATH:/usr/bin /usr/lib/node_modules/pm2/bin/pm2 startup systemd -u ubuntu22 --hp /home/ubuntu22
该命令将生成一个脚本,以便在系统启动时执行。复制并执行命令:
sudo env PATH=$PATH:/usr/bin /usr/lib/node_modules/pm2/bin/pm2 startup systemd -u ubuntu22 --hp /home/ubuntu22
保存:
pm2 save
5、安装和配置Nginx
在本指南中,我们将为Strapi应用程序配置Nginx反向代理。Nginx存在于默认的Ubuntu 22.04存储库中,可以使用以下命令安装:
sudo apt update && sudo apt install nginx -y
一旦安装,我们需要保护我们的网站,以便我们可以通过HTTPS而不是HTTP访问它。在这里,有两种方法可以继续:
Let’s Encrypt(需要公共IP/FDN)。
使用自签名证书(私有IP)。
选项1、生成Let’s Encrypt证书
在继续执行此步骤之前,您需要有一个完全限定的域名。首先,安装所需的软件包:
sudo apt install certbot python3-certbot-nginx
安装后,为您的域名生成SSL证书:
sudo certbot certonly --nginx --agree-tos --no-eff-email --staple-ocsp --preferred-challenges http -m name@computingforgeeks.com -d strapi.computingforgeeks.com
继续并为您的FQDN生成证书:
Successfully received certificate.
Certificate is saved at: /etc/letsencrypt/live/your_domain/fullchain.pem
Key is saved at: /etc/letsencrypt/live/your_domain/privkey.pem
This certificate expires on 2023-07-05.
These files will be updated when the certificate renews.
Certbot has set up a scheduled task to automatically renew this certificate in the background.
Deploying certificate
Successfully deployed certificate for your_domain to /etc/nginx/sites-enabled/your_domain
Successfully deployed certificate for www.your_domain /etc/nginx/sites-enabled/your_domain
Congratulations! You have successfully enabled HTTPS on https://your_domain and https://www.your_domain
选项2、生成自签名证书
此方法适用于那些没有FQDN的用户。对于此方法,请确保在继续操作之前已安装OpenSSL。
为证书创建配置文件:
$ vim strapi_ssl.conf
[req]
default_bits = 2048
default_keyfile = strapi_ssl.key
distinguished_name = req_distinguished_name
req_extensions = req_ext
x509_extensions = v3_ca
[req_distinguished_name]
countryName = Country Name (2 letter code)
countryName_default = KE
stateOrProvinceName = State or Province Name (full name)
stateOrProvinceName_default = Nairobi
localityName = Locality Name (eg, city)
localityName_default = Nairobi
organizationName = Organization Name (eg, company)
organizationName_default = Computingforgeeks
organizationalUnitName = organizationalunit
organizationalUnitName_default = Development
commonName = strapi.computingforgeeks.com
commonName_default = Your_IP-Address
commonName_max = 64
[req_ext]
subjectAltName = @alt_names
[v3_ca]
subjectAltName = @alt_names
[alt_names]
DNS.1 = localhost
DNS.2 = Your_IP-Address
在使用以下命令生成证书之前,请根据需要替换所有值:
openssl req -x509 -nodes -days 365 -newkey rsa:2048 -keyout strapi_ssl.key -out strapi_ssl.crt -config strapi_ssl.conf
按Enter键到最后生成证书。将这些证书复制到/etc/ssl/certs目录中,如下所示:
sudo cp strapi_ssl.crt /etc/ssl/certs/strapi_ssl.crt
sudo mkdir -p /etc/ssl/private/
sudo cp strapi_ssl.key /etc/ssl/private/strapi_ssl.key
接下来,将配置Nginx反向代理。
现在,请为我们的网站创建一个virtual host:
sudo vim /etc/nginx/conf.d/strapi.conf
在文件中,添加以下行:
server {
# Redirect any http requests to https
listen 80;
listen [::]:80;
server_name strapi.computinforgeeks.com;
return 301 https://$host$request_uri;
}
server {
listen 443 ssl http2;
listen [::]:443 ssl http2;
server_name strapi.computingforgeeks.com;
access_log /var/log/nginx/strapi.access.log;
error_log /var/log/nginx/strapi.error.log;
# TLS configuration
ssl_certificate /etc/ssl/certs/strapi_ssl.crt;
ssl_certificate_key /etc/ssl/private/strapi_ssl.key;
ssl_protocols TLSv1.2 TLSv1.3;
ssl_prefer_server_ciphers on;
ssl_session_cache shared:SSL:50m;
ssl_session_timeout 1d;
# OCSP Stapling ---
# fetch OCSP records from URL in ssl_certificate and cache them
location / {
proxy_set_header X-Real-IP $remote_addr;
proxy_set_header X-Forwarded-Proto $scheme;
proxy_set_header X-Forwarded-Host $http_host;
proxy_set_header X-Forwarded-For $proxy_add_x_forwarded_for;
proxy_pass http://127.0.0.1:1337;
}
}
如果您使用了Let’s Encrypt,请提供SSL证书的确切路径。保存文件并重新启动Nginx:
sudo systemctl restart nginx
如果您启用了UFW,则可以拒绝Strapi端口并仅允许Nginx:
sudo ufw deny 1337/tcp
sudo ufw allow 'Nginx Full'
6、访问和使用Strapi应用程序
现在,您已设置好访问并使用Strapi应用程序。使用URL从您喜爱的浏览器访问,地址格式是https://domain_name。然后使用URL导航到管理网站,地址格式是https://domain_name/admin,如下所示:
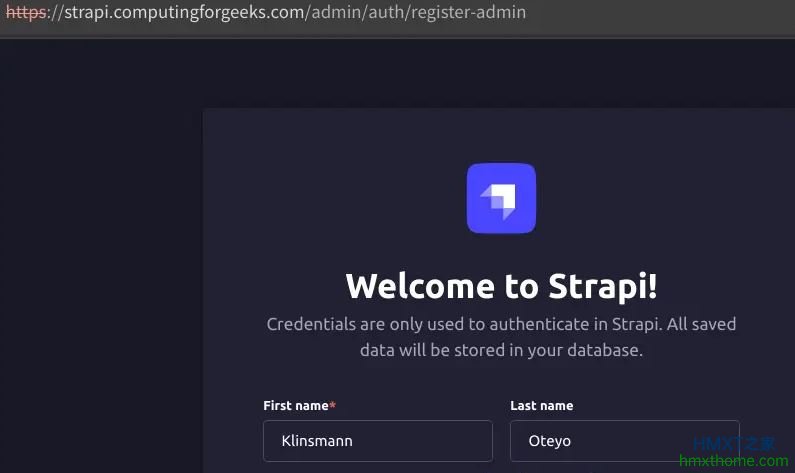
创建一个管理员帐户,然后转到下面的面板:

现在您可以使用Strapi应用程序了。我们将从安装SEO插件开始。所以导航到市场:

以下是成功显现的页面:

在您的shell中,执行以下命令来安装SEO插件:
cd ~/strapi-project
npm install @strapi/plugin-seo
完成后,创建以下文件:
$ vim config/plugins.js
module.exports = ({ env }) => ({
// ...
seo: {
enabled: true,
},
// ...
});
保存文件并重新生成管理面板:
NODE_ENV=production npm run build
一旦建立,SEO插件将被添加到您的网站:
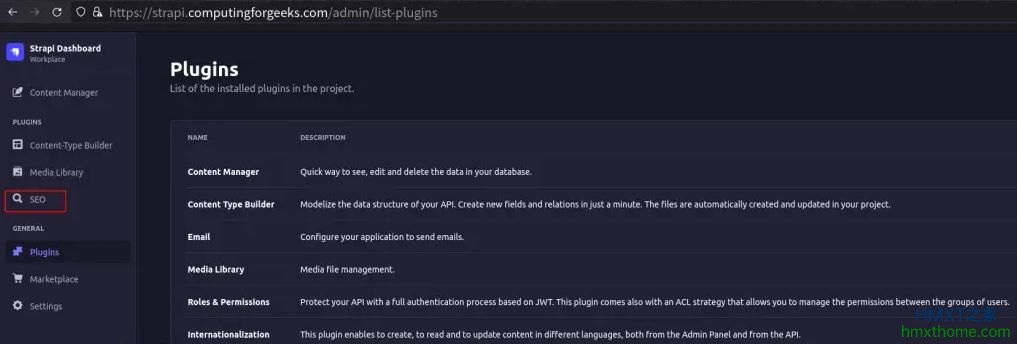
要对Strapi进行所需设置,请导航到设置选项卡:
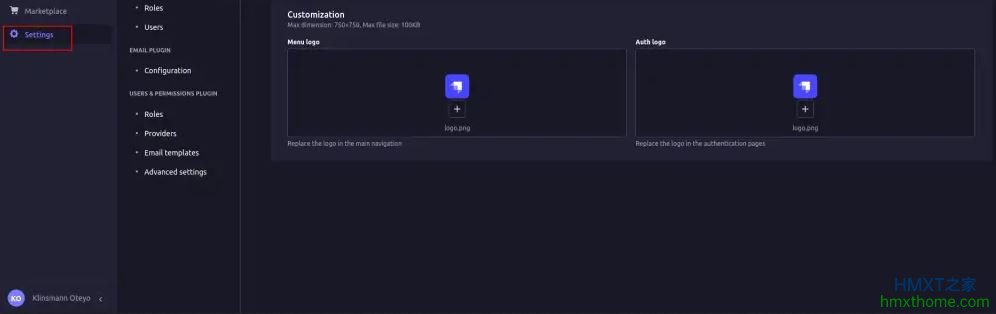
另一件重要的事情是API令牌。它们允许在Strapi上执行请求的REST API端点作为身份验证用户。要生成令牌,请导航到设置选项卡:

创建API令牌很简单,提供令牌的名称、描述和权限。一旦创建,令牌将可用,如下所示。可在下图中复制此内容,因为它不会再次出现:

至此,已完成在Ubuntu 22.04上使用SEO插件部署Strapi应用程序的全过程。可以得出的一个总结是:Strapi是一个功能强大、用途广泛的工具,可以帮助开发人员创建强大、可扩展和可定制的数字体验,此外,Strapi提供了大量的文档和支持性社区,帮助您开始并解决可能遇到的任何问题。
相关资讯


